Run Your First Circuit Simulation
Let's run a simulation to see how your circuit performs. Then we'll modify it and see how the results change.
Before starting, follow Designing a Photonics Circuit to create the two-ring circuit used in this tutorial.
Run your first simulation
If you already changed the ring radii in the graphical workflow tutorial, set both rings to 10 µm before running this first simulation.
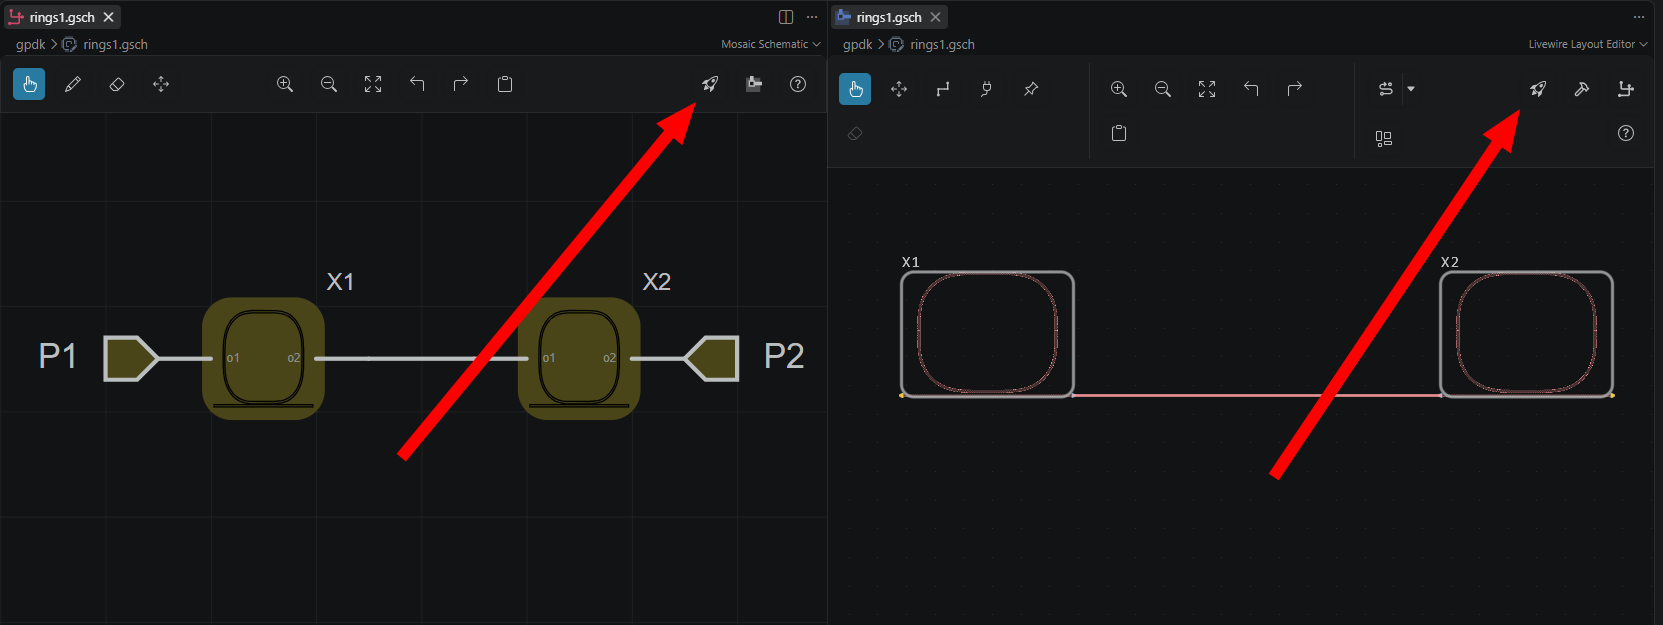
In Mosaic or Livewire, click the rocket 🚀 button in the top-right toolbar to open the simulation panel.
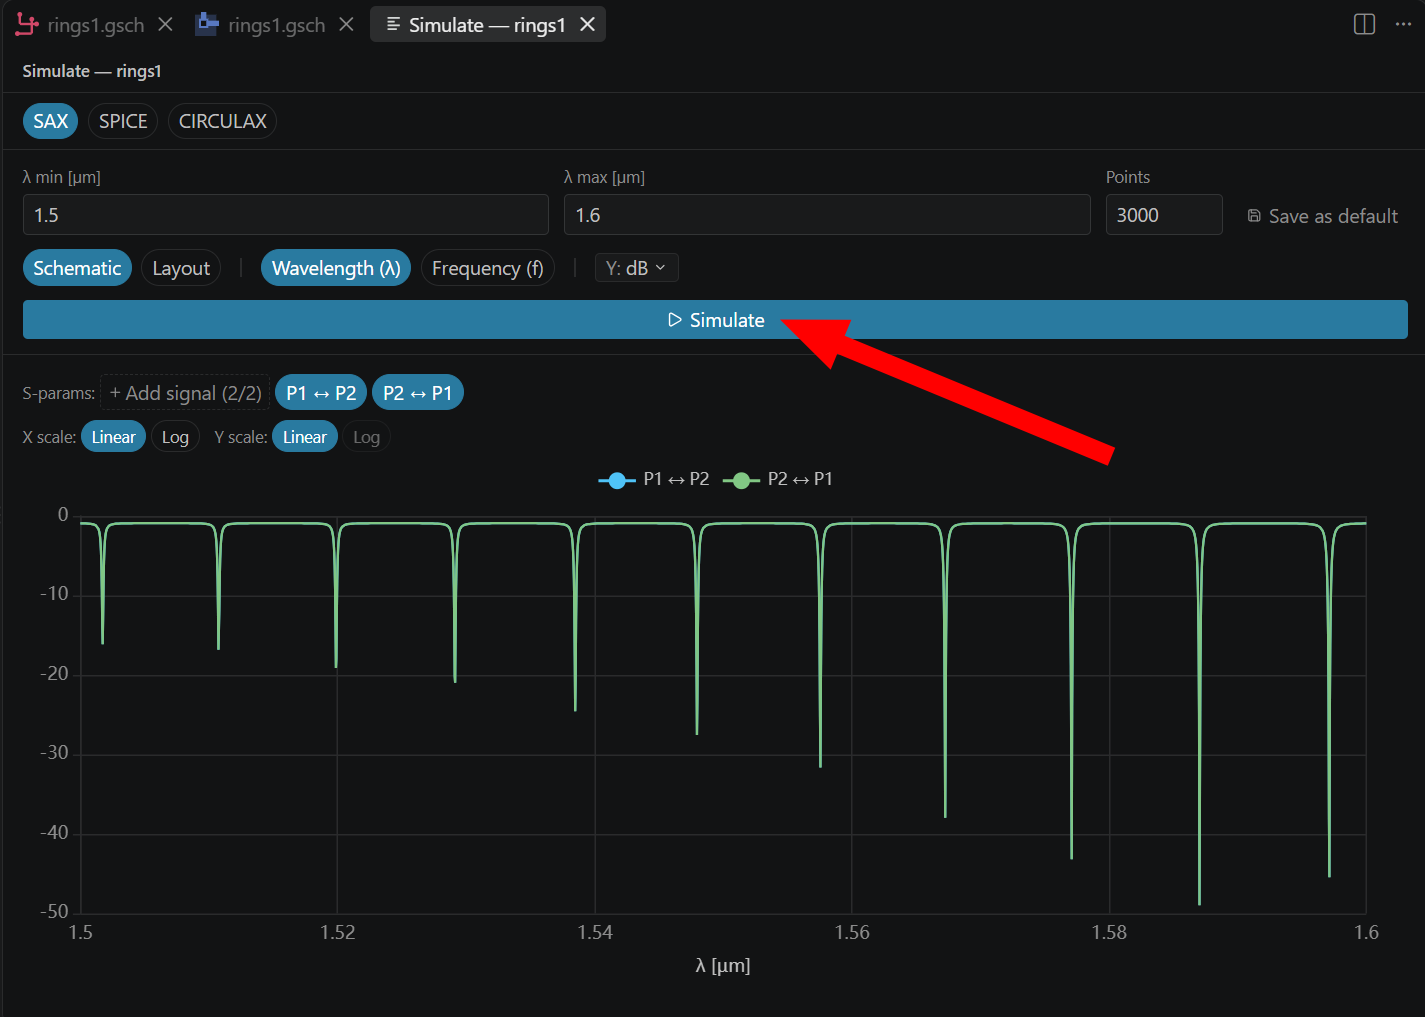
Select SAX and Layout, leave the default wavelength range, then click ▷ Simulate. Results appear below the simulation controls.
Modify and re-simulate
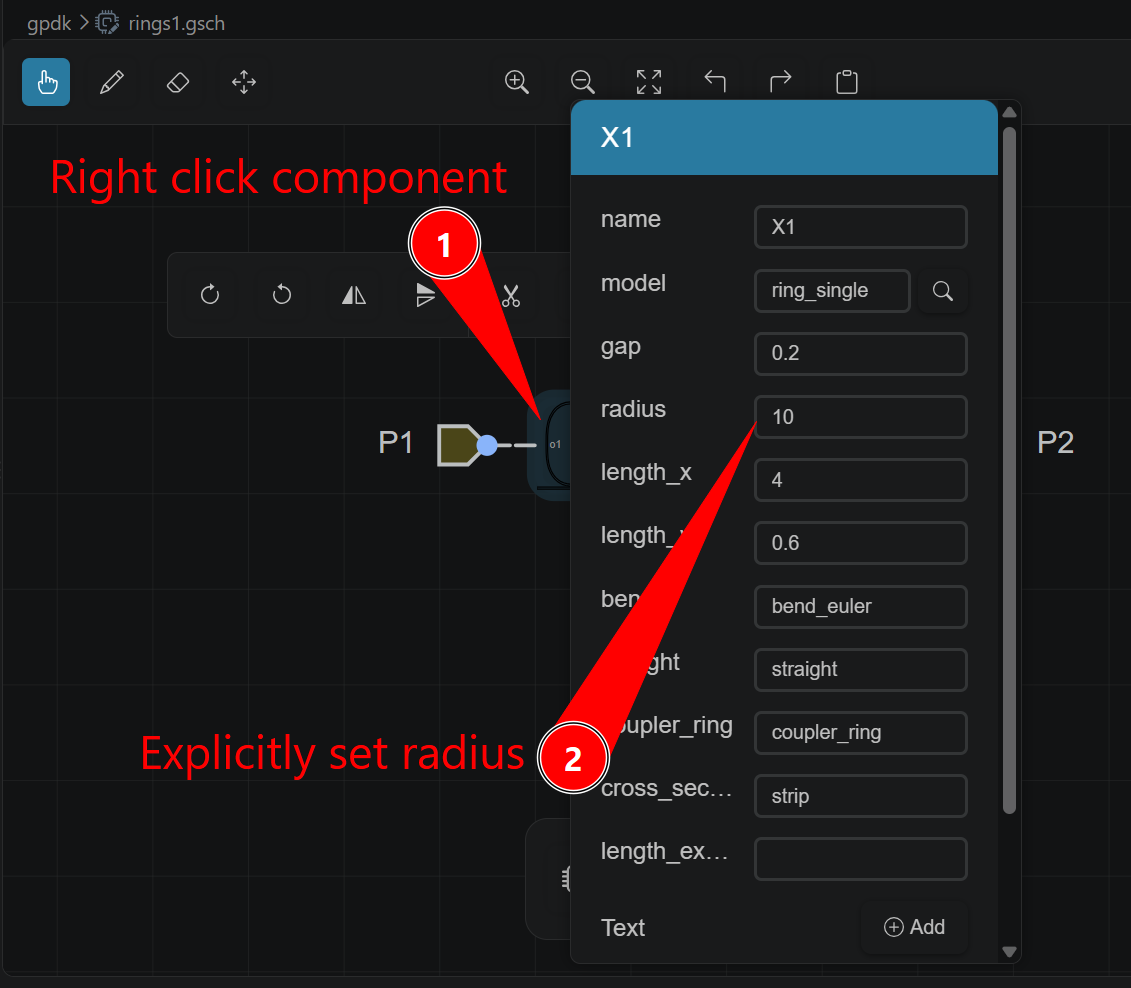
In Mosaic, right-click the second ring, X2, to edit its properties. Set its radius to 11 µm, leaving X1 at 10 µm. The screenshot below shows where to edit a ring's radius.
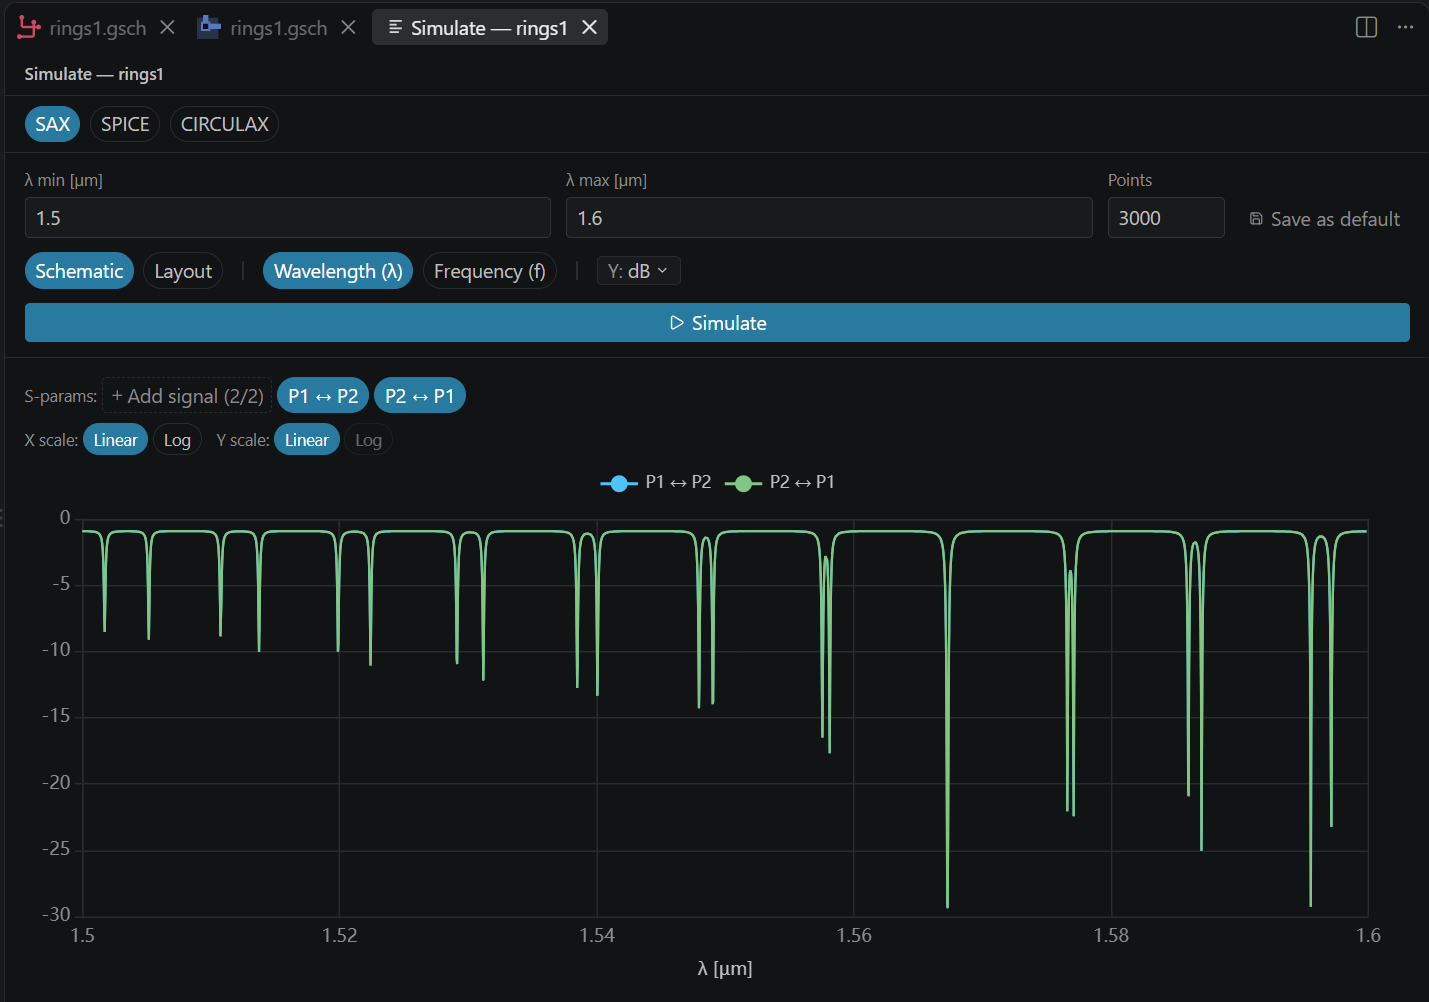
In Livewire, realign and reroute the rings if the radius change has displaced their ports. Run the layout simulation again to see the different resonance patterns of the two rings.
🎉 Congratulations! You've simulated your first circuit!
Next Steps
After running your first simulation, you can:
- Learn how to interpret simulation results in the workflow tutorials:
- Photonics circuit simulation — Wavelength sweep analysis
- Electrical circuit simulation — SPICE frequency response
-
Quantum-RF circuit simulation — S-parameter analysis
-
Explore device-level simulations with Mode Solver Simulations
-
Continue with verification checks to ensure your design meets manufacturing requirements