Step 3a: Check for Design Errors - DRC
Let's check for errors that will affect the manufacturability of your chip using Design Rule Checking (DRC).
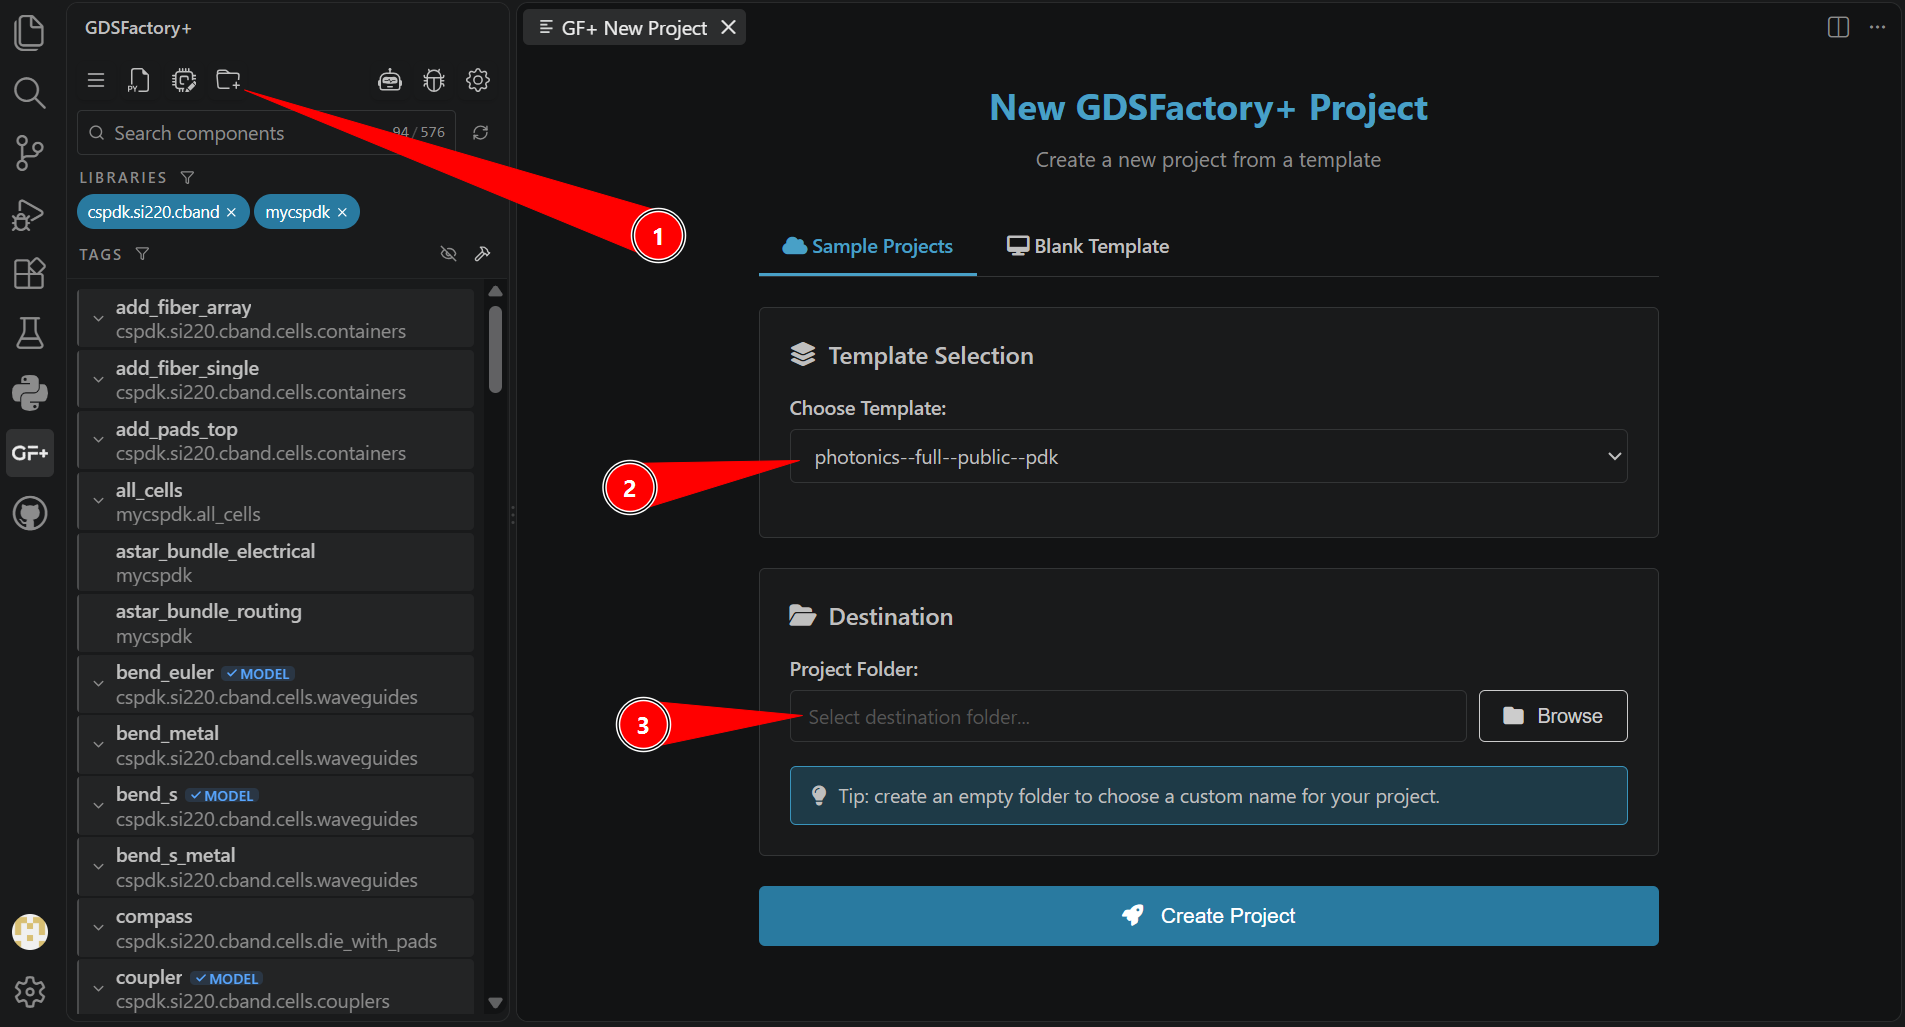
This tutorial uses the photonics-full PDK, a public resource bundled with GDSFactory+. If you aren't already in a photonics-full project, to take full advantage of this tutorial, create a new template project with the New GDSFactory+ Project button at the top of the GF+ sidebar, select photonics--full-public--pdk from the list, and customize the destination folder. Then, use 🚀 Create Project to get started!
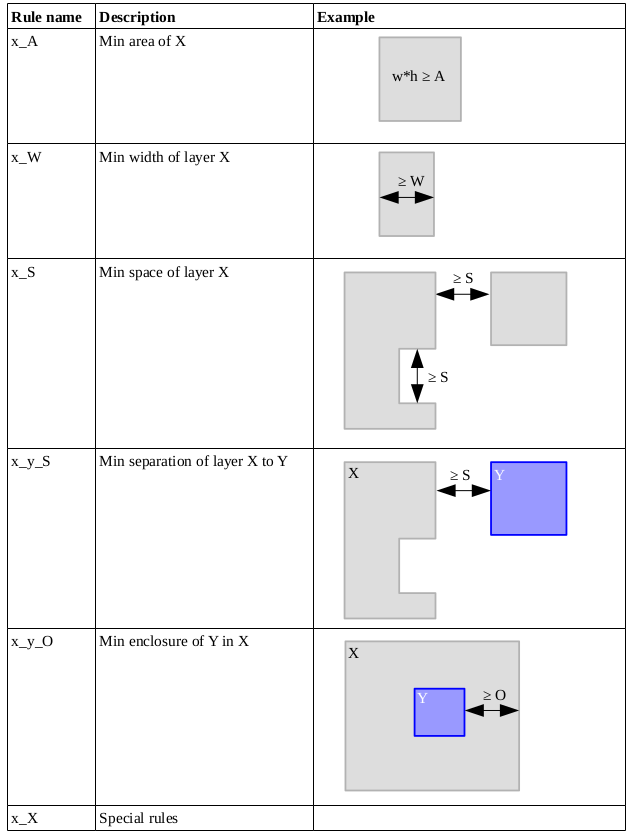
What DRC rules check
DRC compares your layout against the geometric constraints defined by the foundry for your PDK. Common rules check that a feature has enough area and width, shapes on the same layer have enough space, shapes on different layers have enough separation, and one layer properly encloses another (for example, a via inside a metal pad).
The required values depend on the selected PDK and process. A DRC result identifies the geometry that violates one of those constraints so you can adjust the layout before fabrication.
This video walks through the same steps, but the written guide below contains the most up-to-date instructions in the most recent GDSF+ version.
Run a DRC check
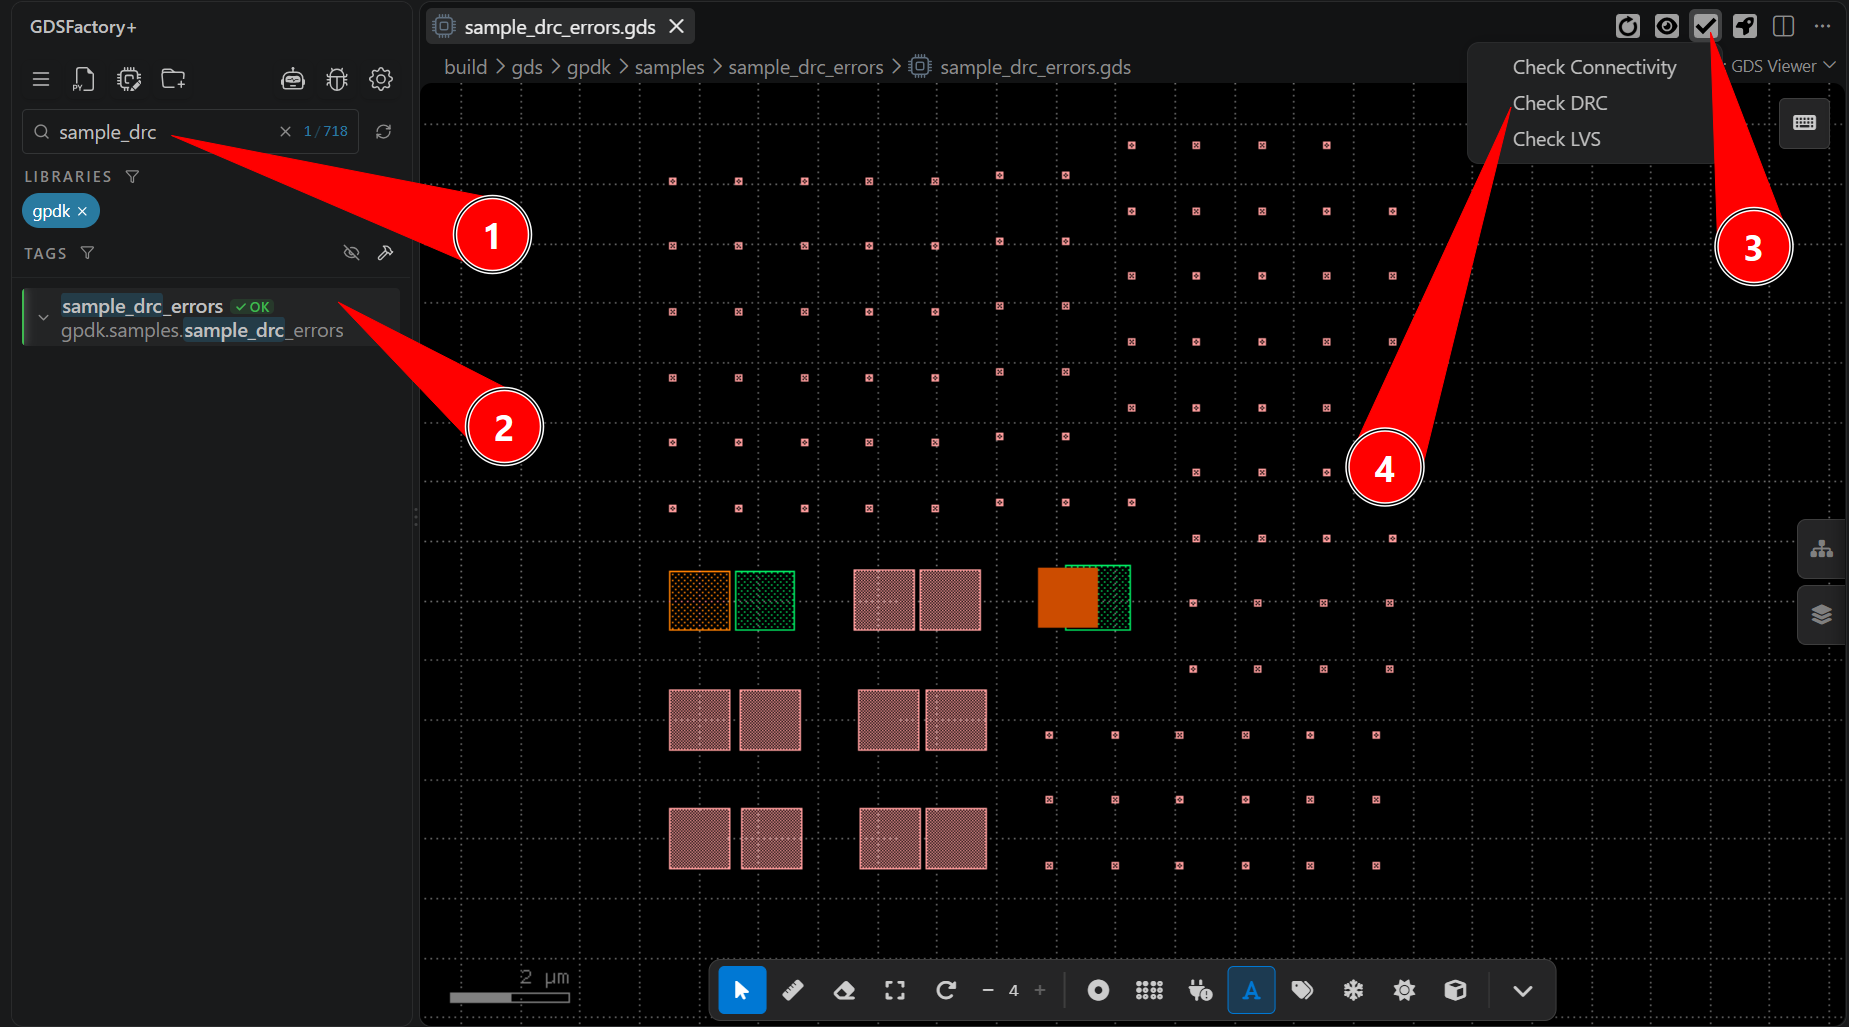
In the GF+ tab, search "sample_drc" and open the sample_drc_errors GDS file from project components. In the top right bar of the GDS View tab, click on the Check icon, then select the Check DRC button.
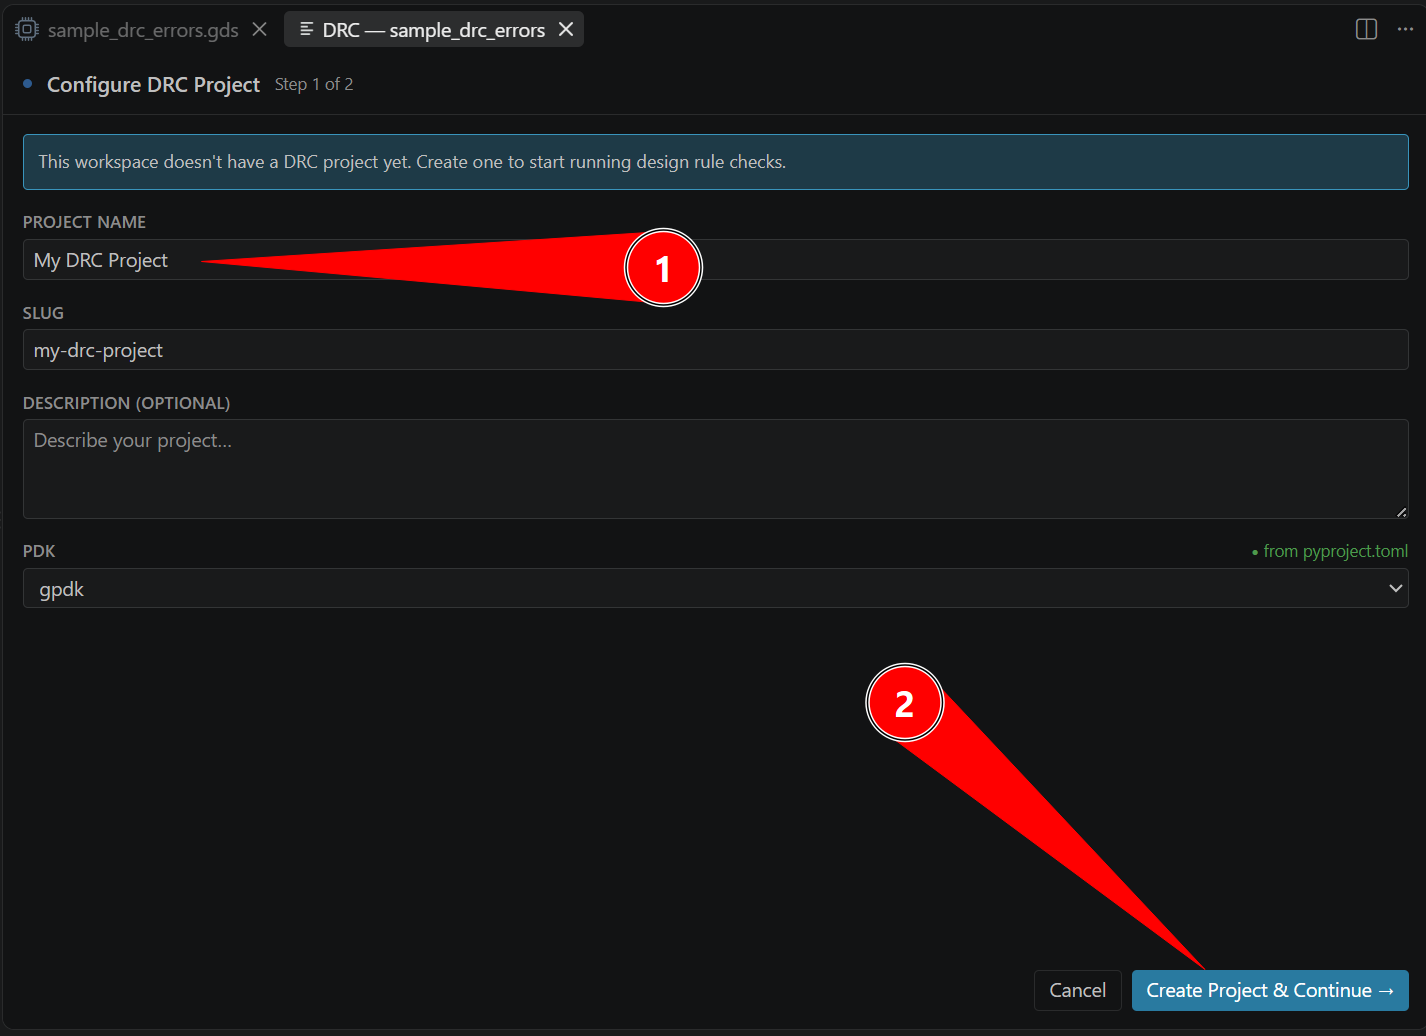
Before GDSFactory+ can flag DRC issues, it needs to create a DRC project and select what rules it will search for. In a new tab, you'll be prompted to Configure DRC Project. Enter a project name (for example "My DRC Project") and select "Create Project & Continue" on the bottom right.
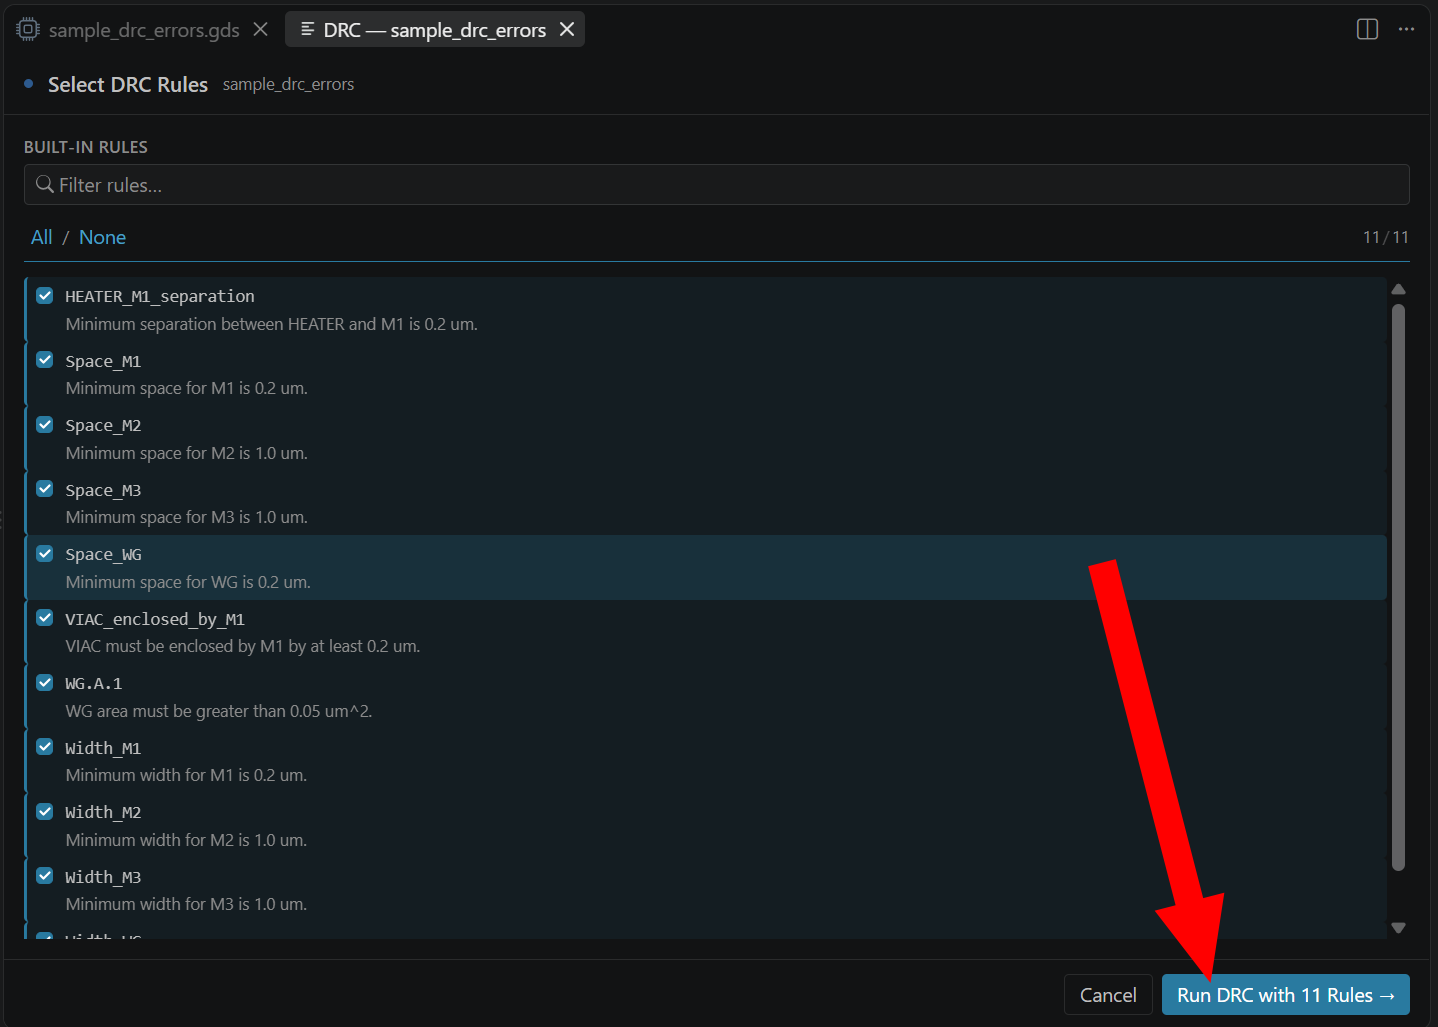
Then, make sure all DRC rules are enabled and select "Run DRC with 11 Rules".
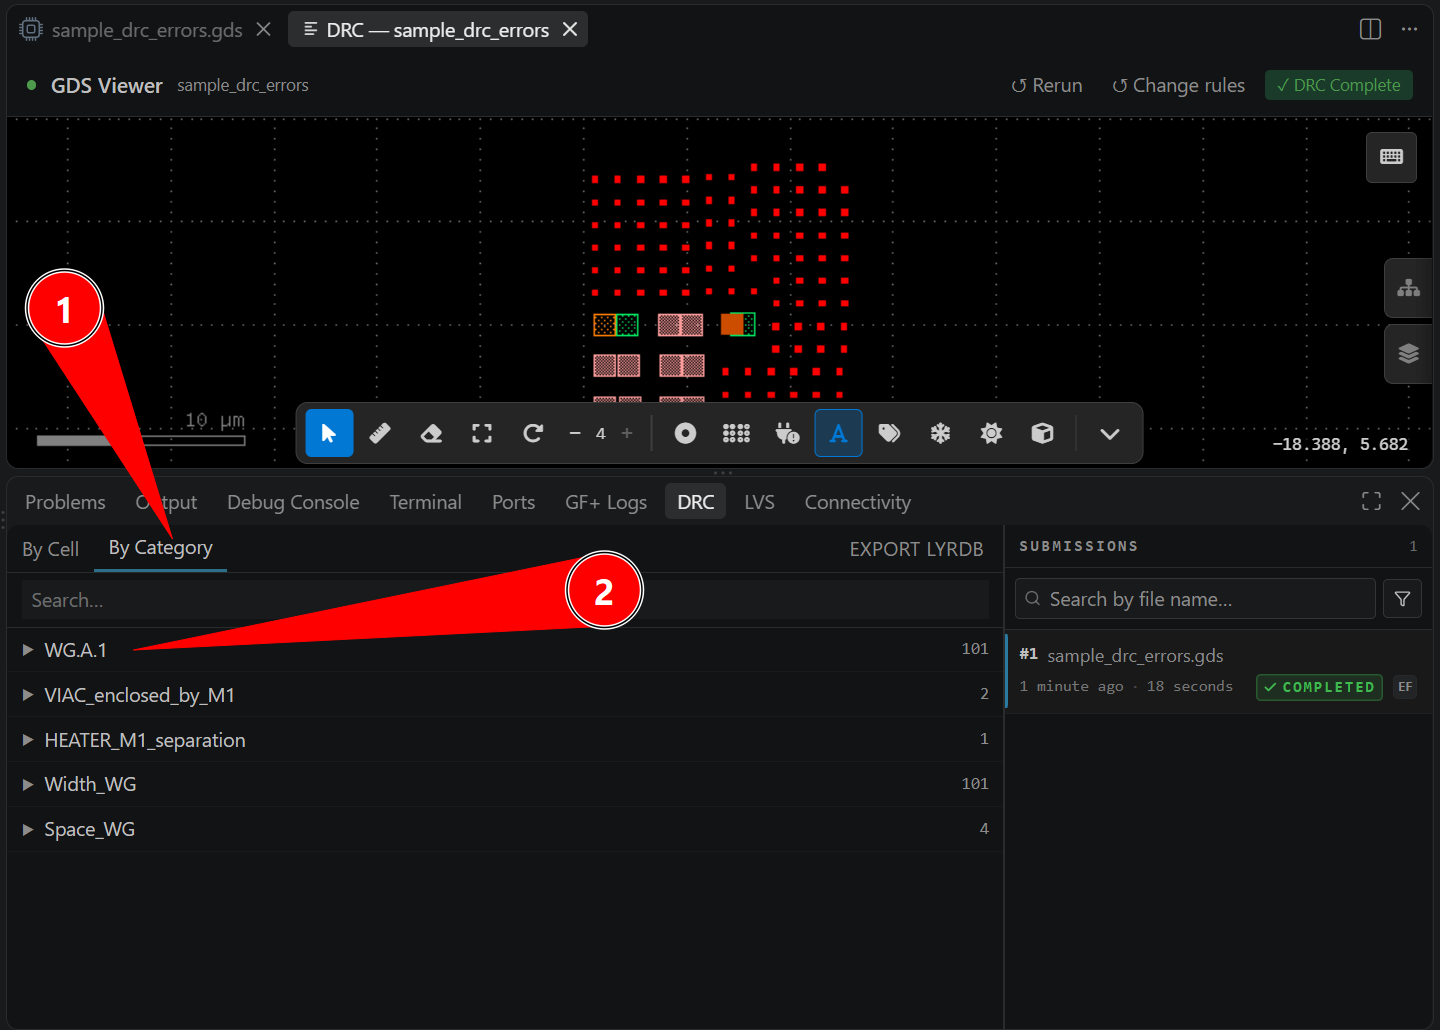
When the process is finished, the DRC tab will be automatically selected on the bottom navigation bar of VSCode. In this tab, errors can be reviewed. You should see a number of errors, including min_space errors. You can show errors by selecting "By Category".
Click on any DRC category to highlight all errors from this category:
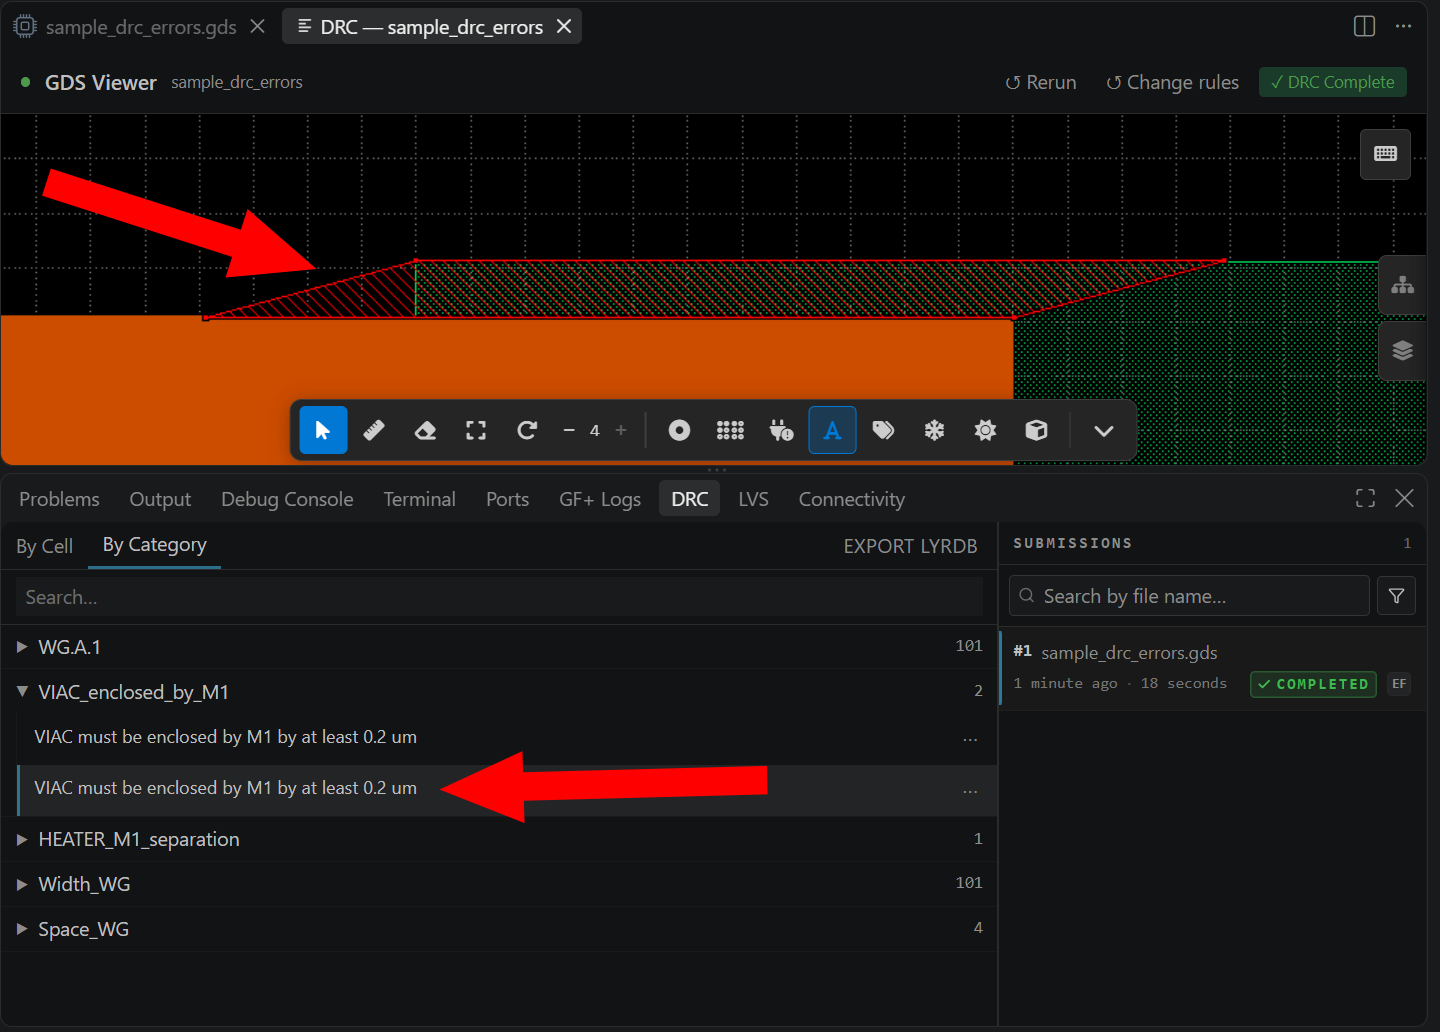
Click on any DRC error to see the error highlighted in the layout:
Fix the errors with the Agent (optional)
You can ask the Agent to run DRC and fix the errors for you. Select the Launch AI Agent button, and under settings select Claude Opus 4.6. Enable Auto-approve all tool actions and type in "fix drc errors in sample_drc_errors".
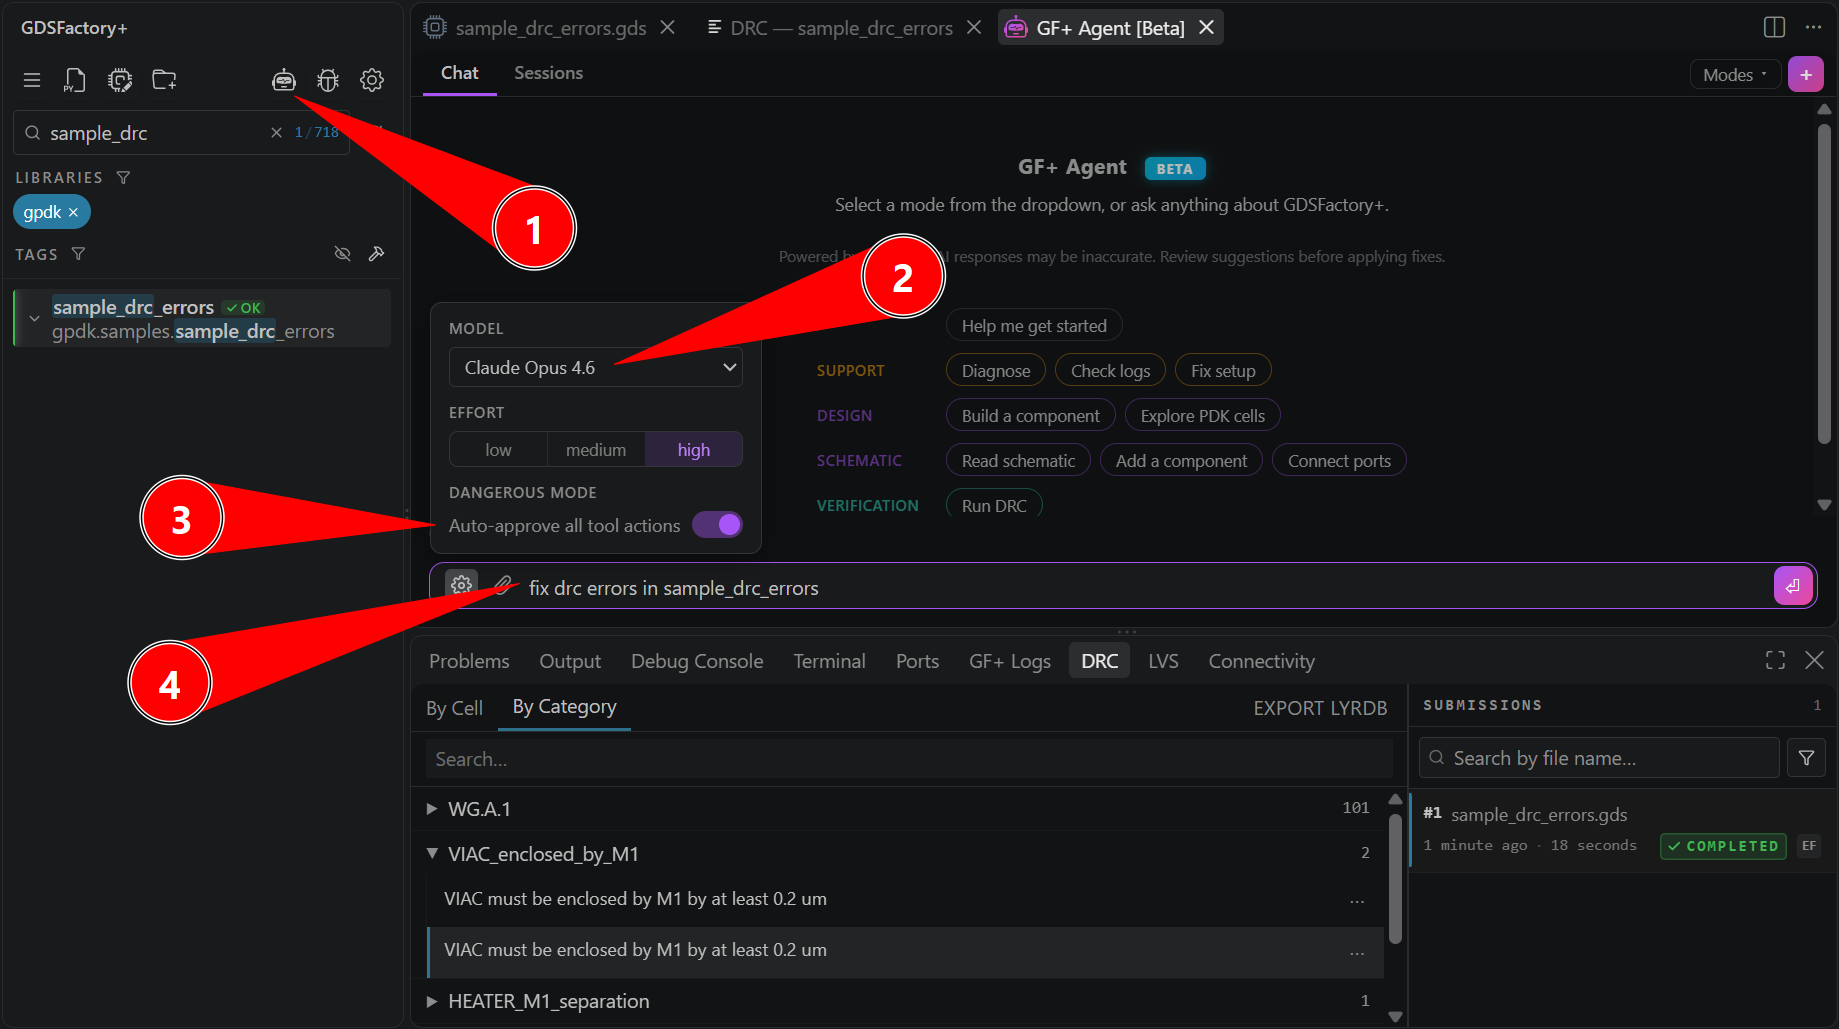
After it's done, if you run DRC again, it'll come back totally clean.
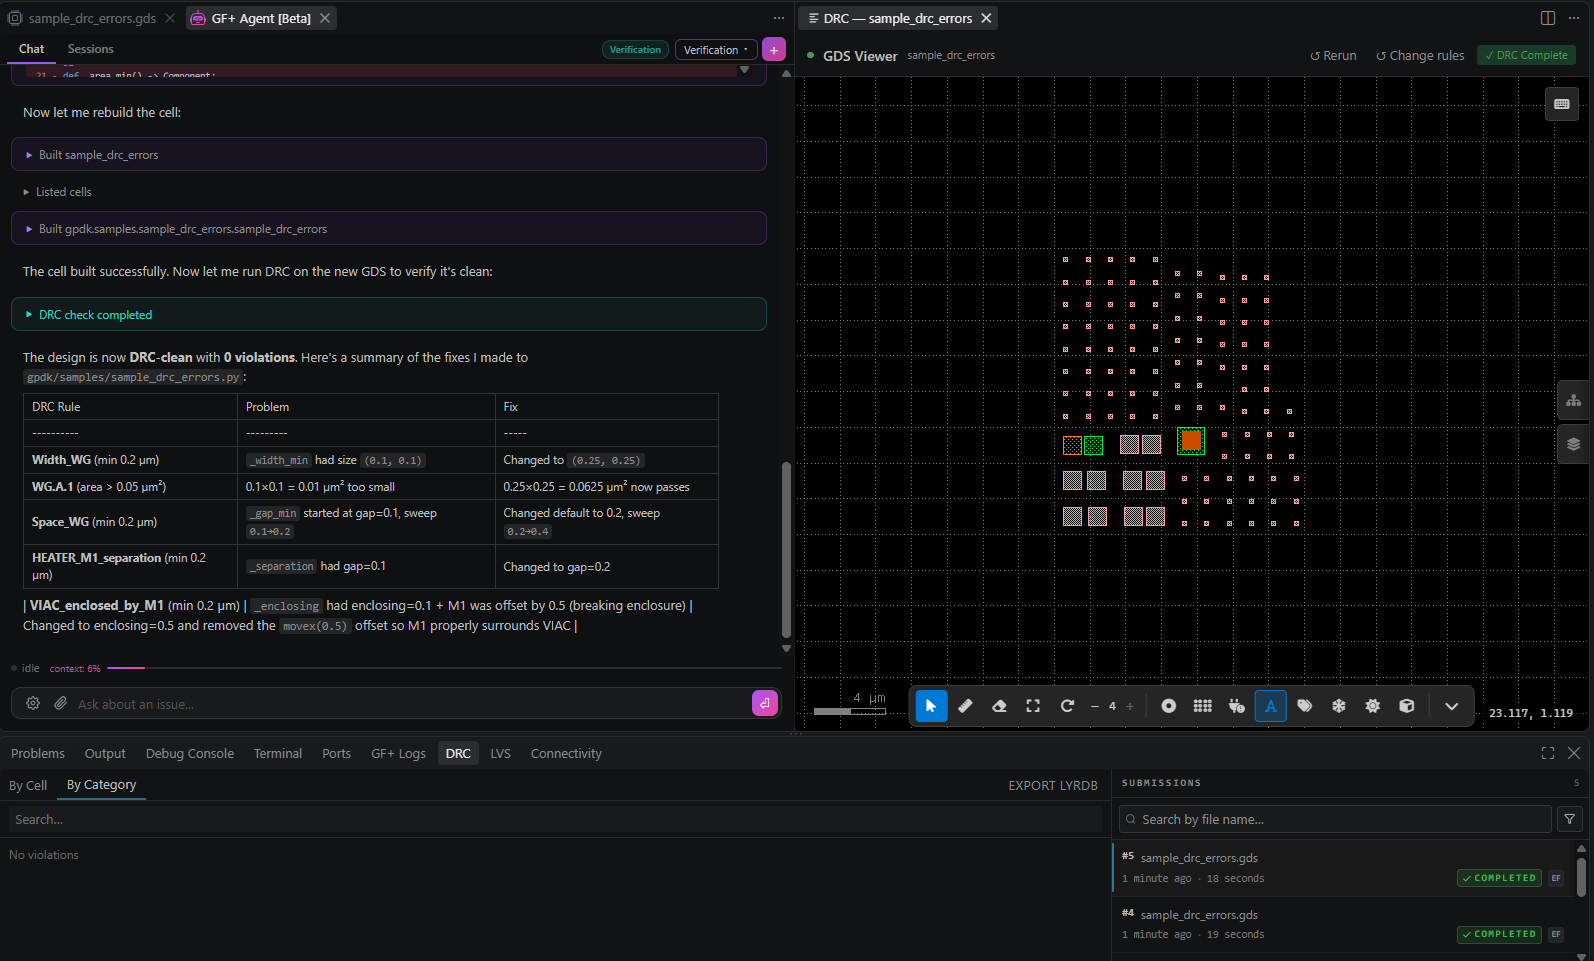
Fix the errors manually (optional, for advanced users)
Select the identifier gpdk.samples.sample_drc_errors to open the associated .py file that builds the faulty GDS. Modify the Python code to remove the errors. Then run the DRC again on the GDS file and repeat until you have fixed all the DRC errors.
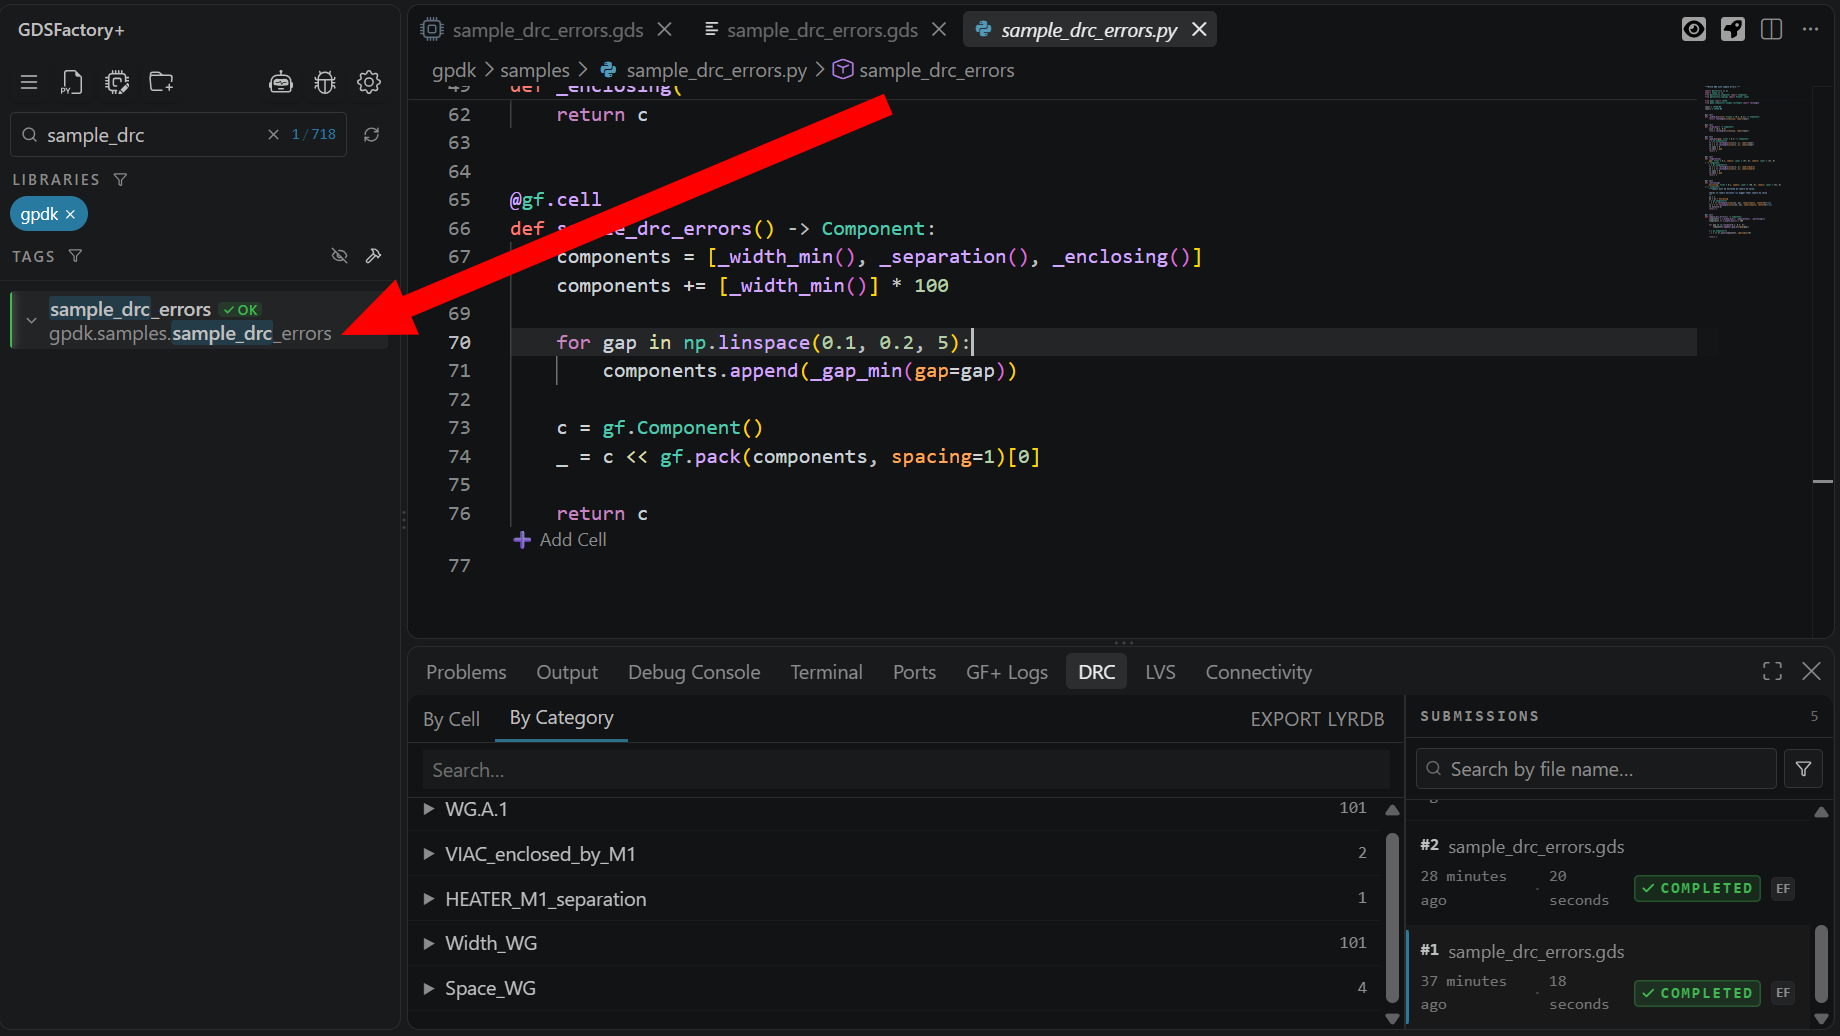
After fixing the errors, everything is now complete. Your chip is ready for fabrication! 🎉
Try other checks (optional)
Besides DRC, you can also run Connectivity and LVS checks from the same checkmark dropdown menu in the top right toolbar.
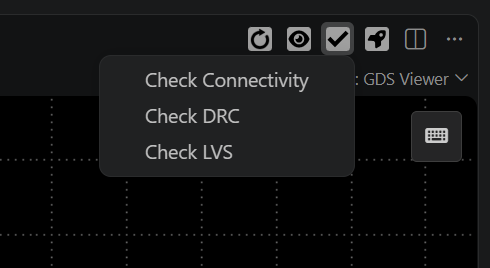
For a detailed guide on LVS checking, see Step 3b: Check for Connectivity Errors - LVS.
Next Steps
Continue to Step 3b: Check for Connectivity Errors - LVS, or skip ahead to Step 4: Build a Component with the AI Agent.