Step 3a: Check for Design Errors - DRC
Let's check for errors that will affect the manufacturability of your chip using Design Rule Checking (DRC).
The following video walks through the same steps. The written guide below contains the most up-to-date instructions.
Run a DRC check
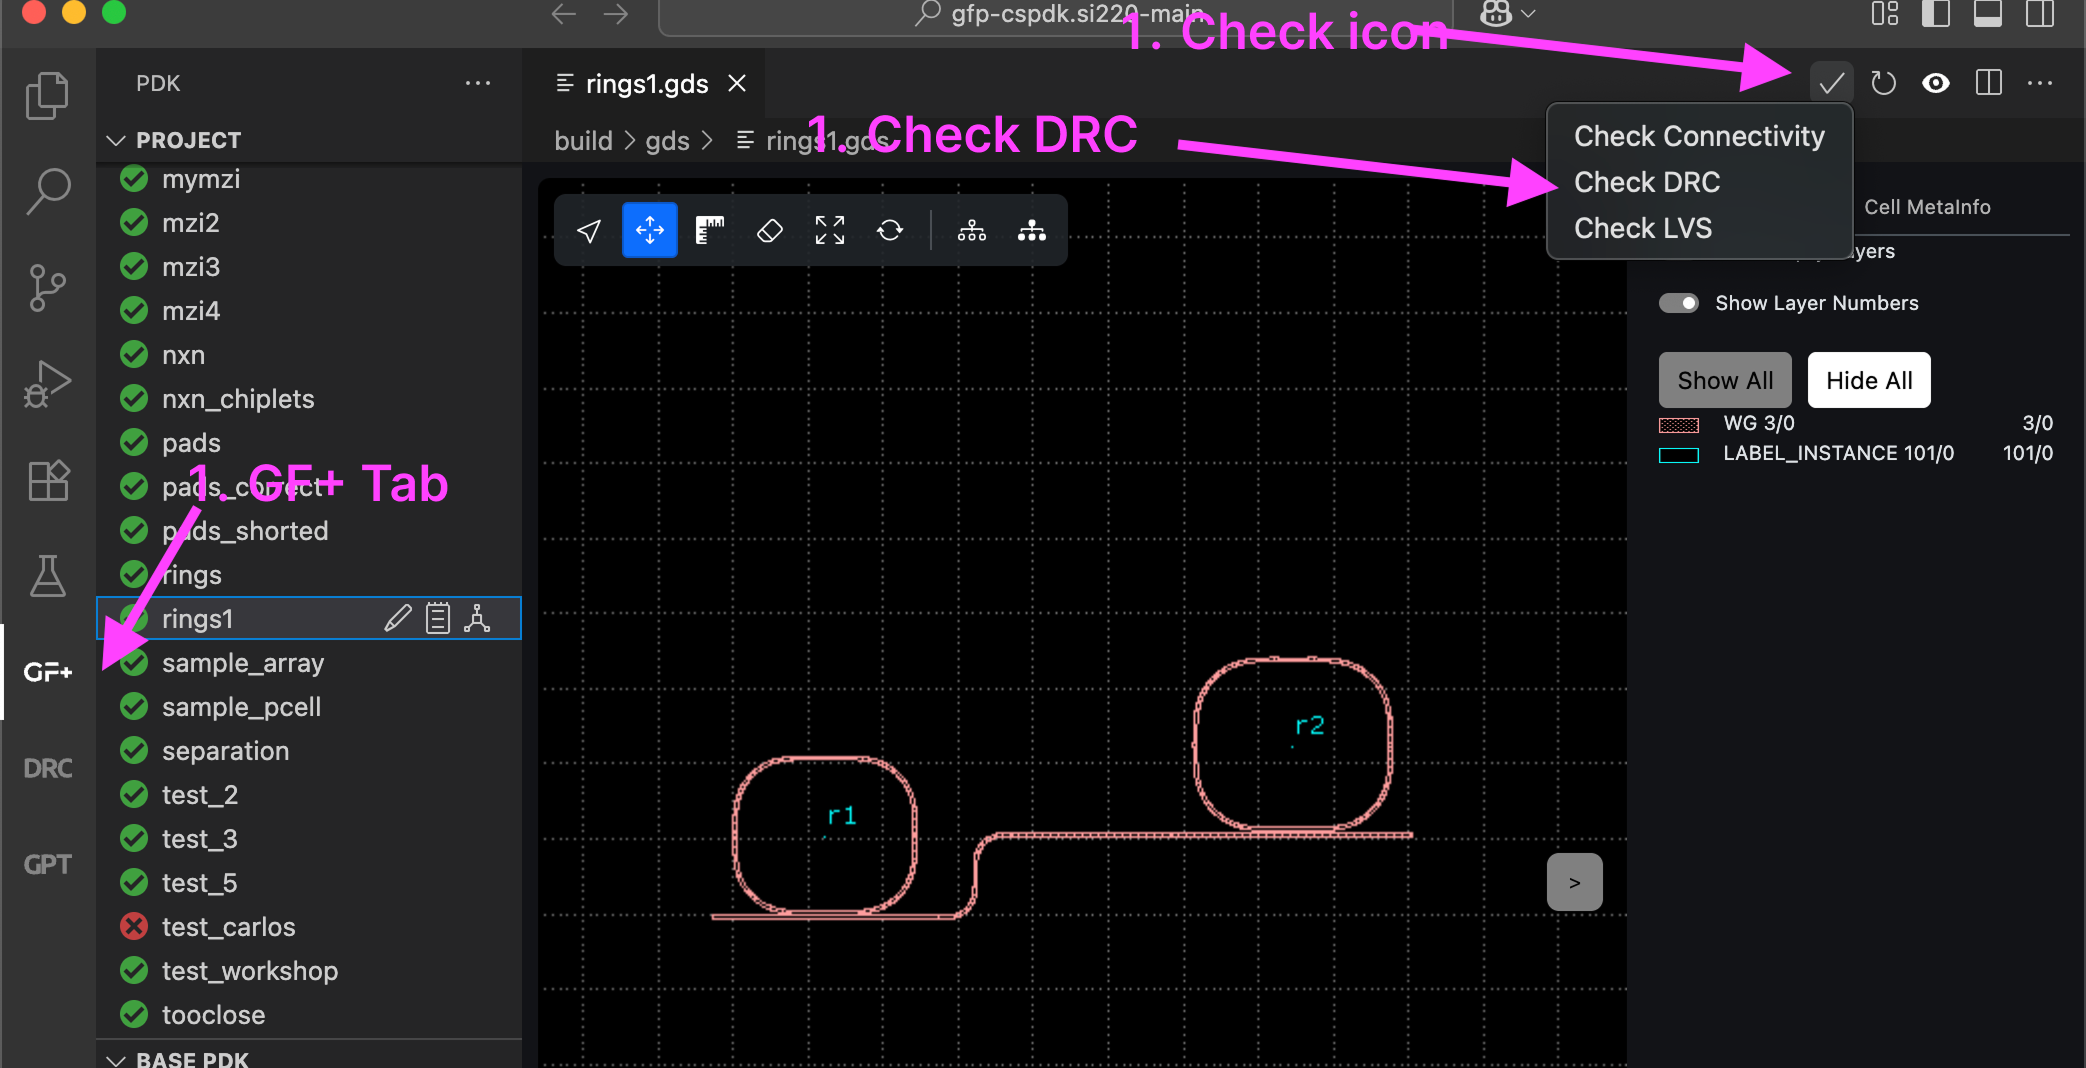
In the GF+ tab, open the sample_drc_errors GDS file from project components. In the top right bar of the GDS View tab, click on the DRC button. Wait for the checking process to finish.
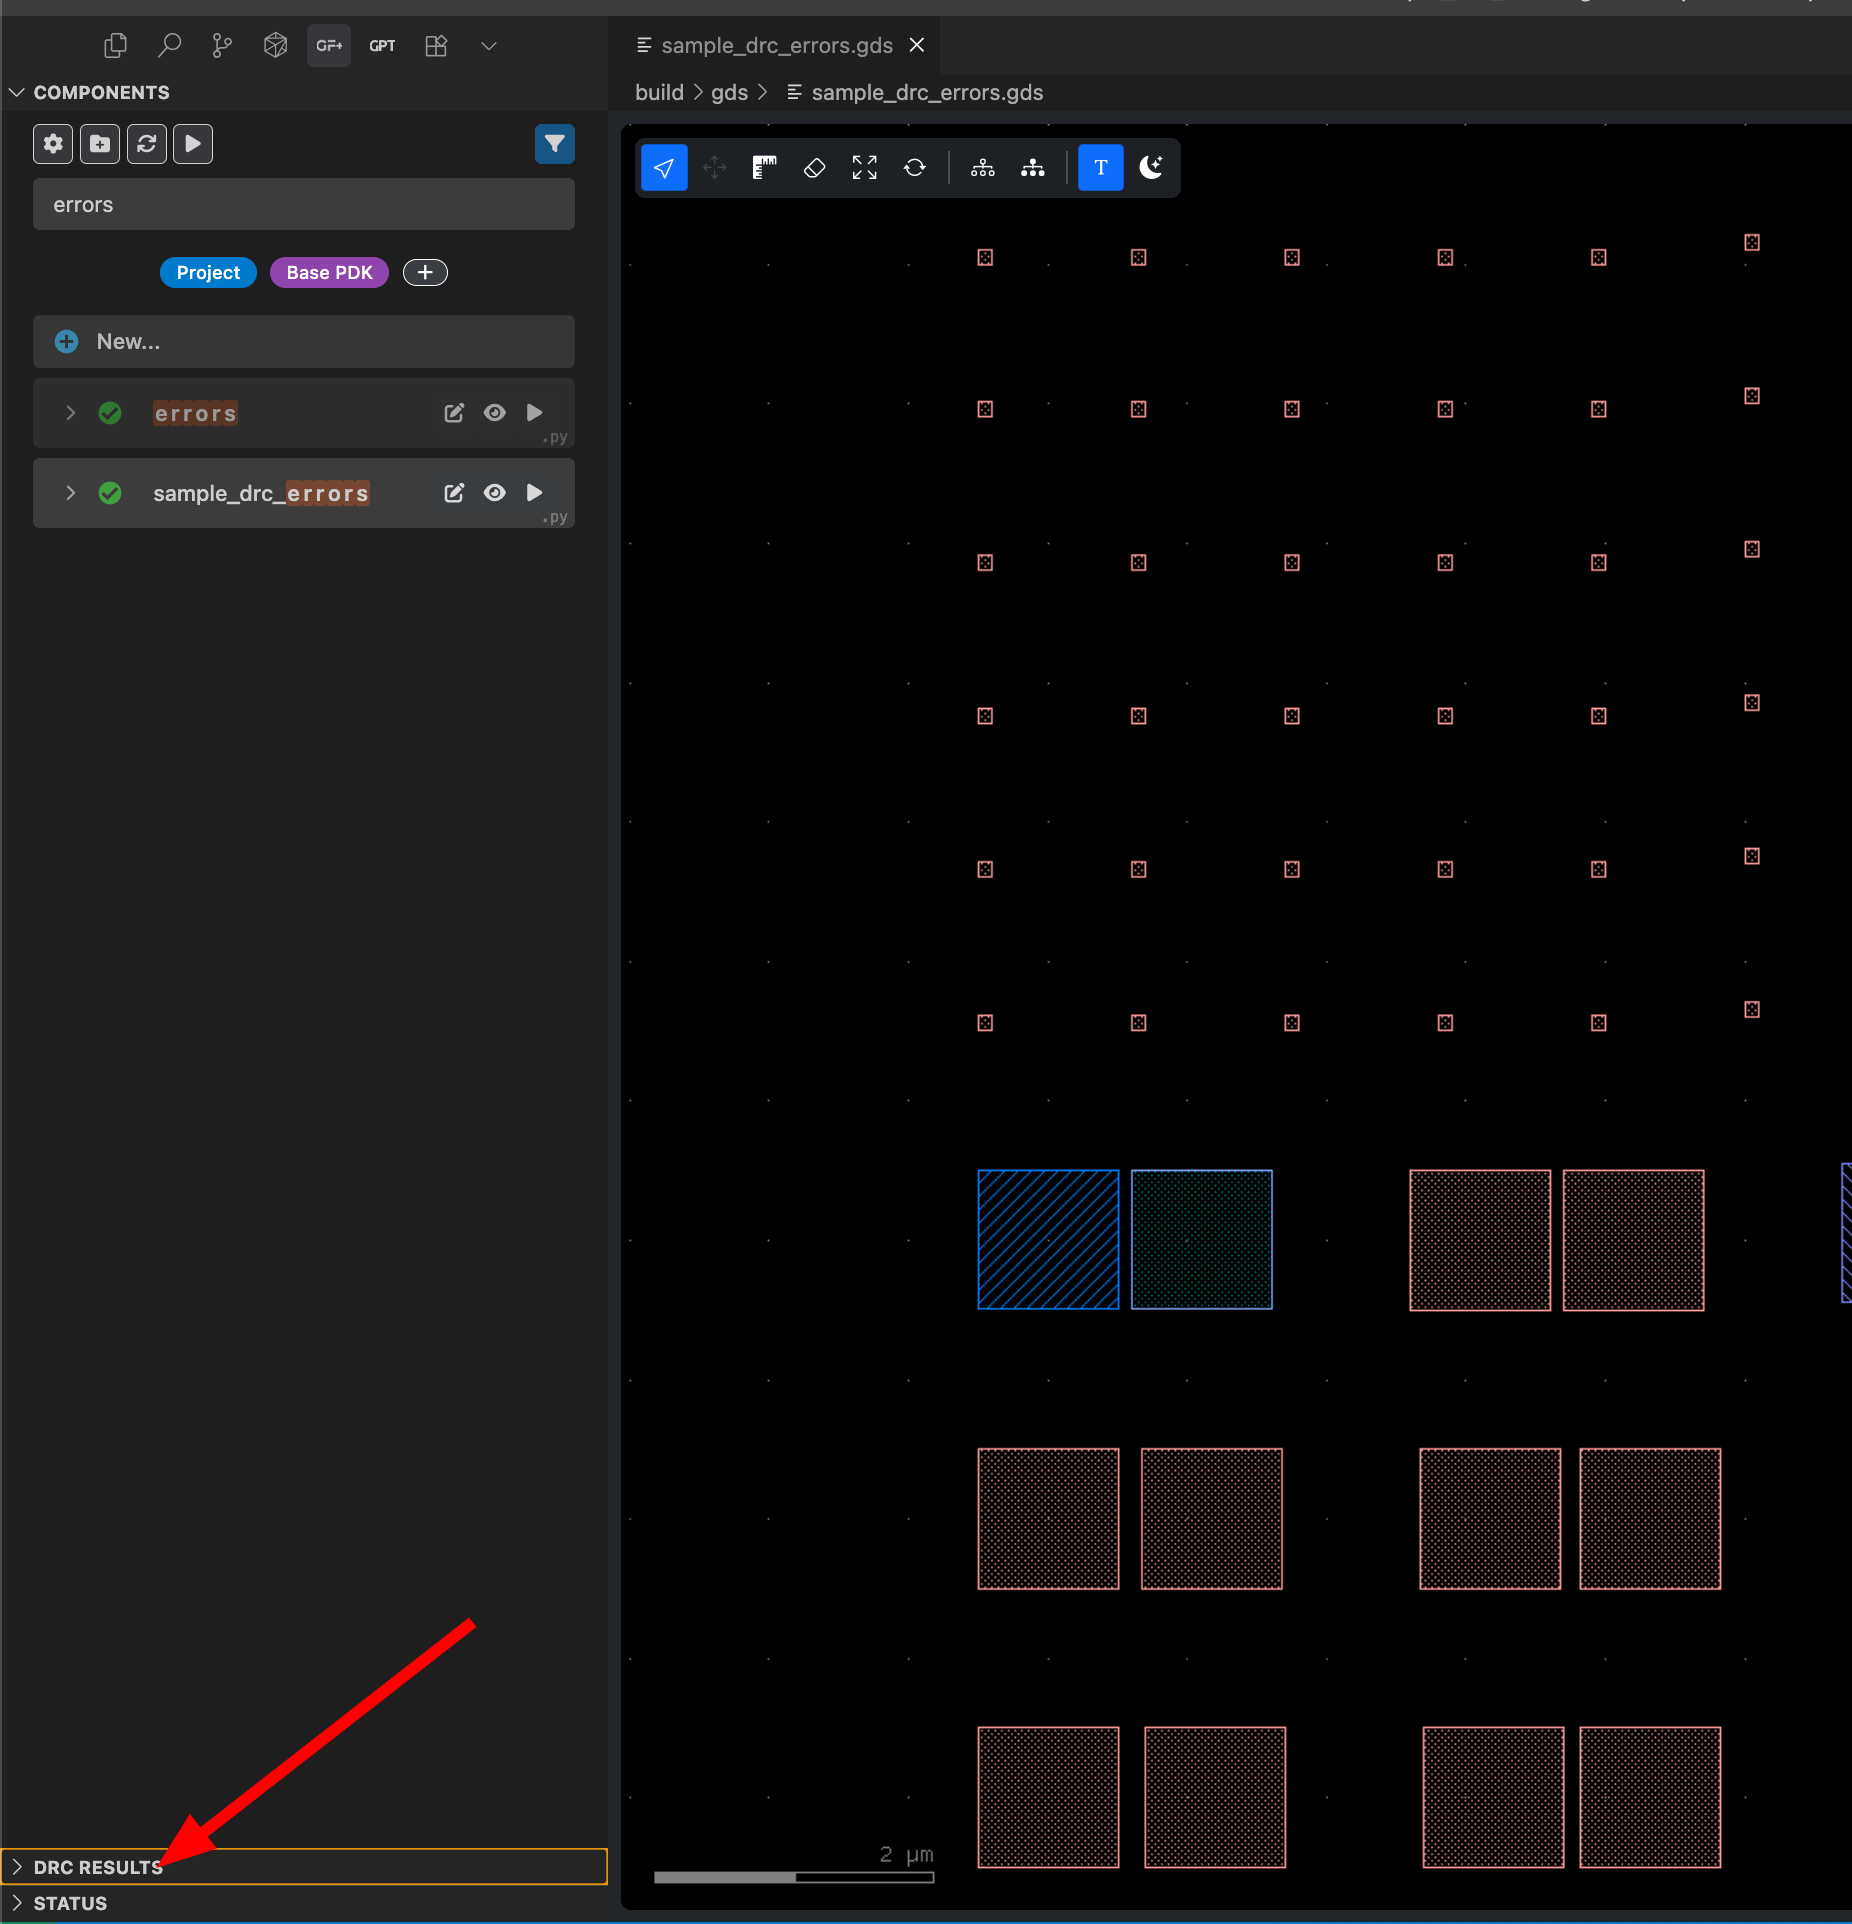
When the process is finished, the DRC tab will be automatically selected in the left navigation bar of VSCode. In this tab, errors can be reviewed. You should see a number of errors, including min_space errors. You can show errors by Category.
Click on any DRC category to highlight all errors from this category:
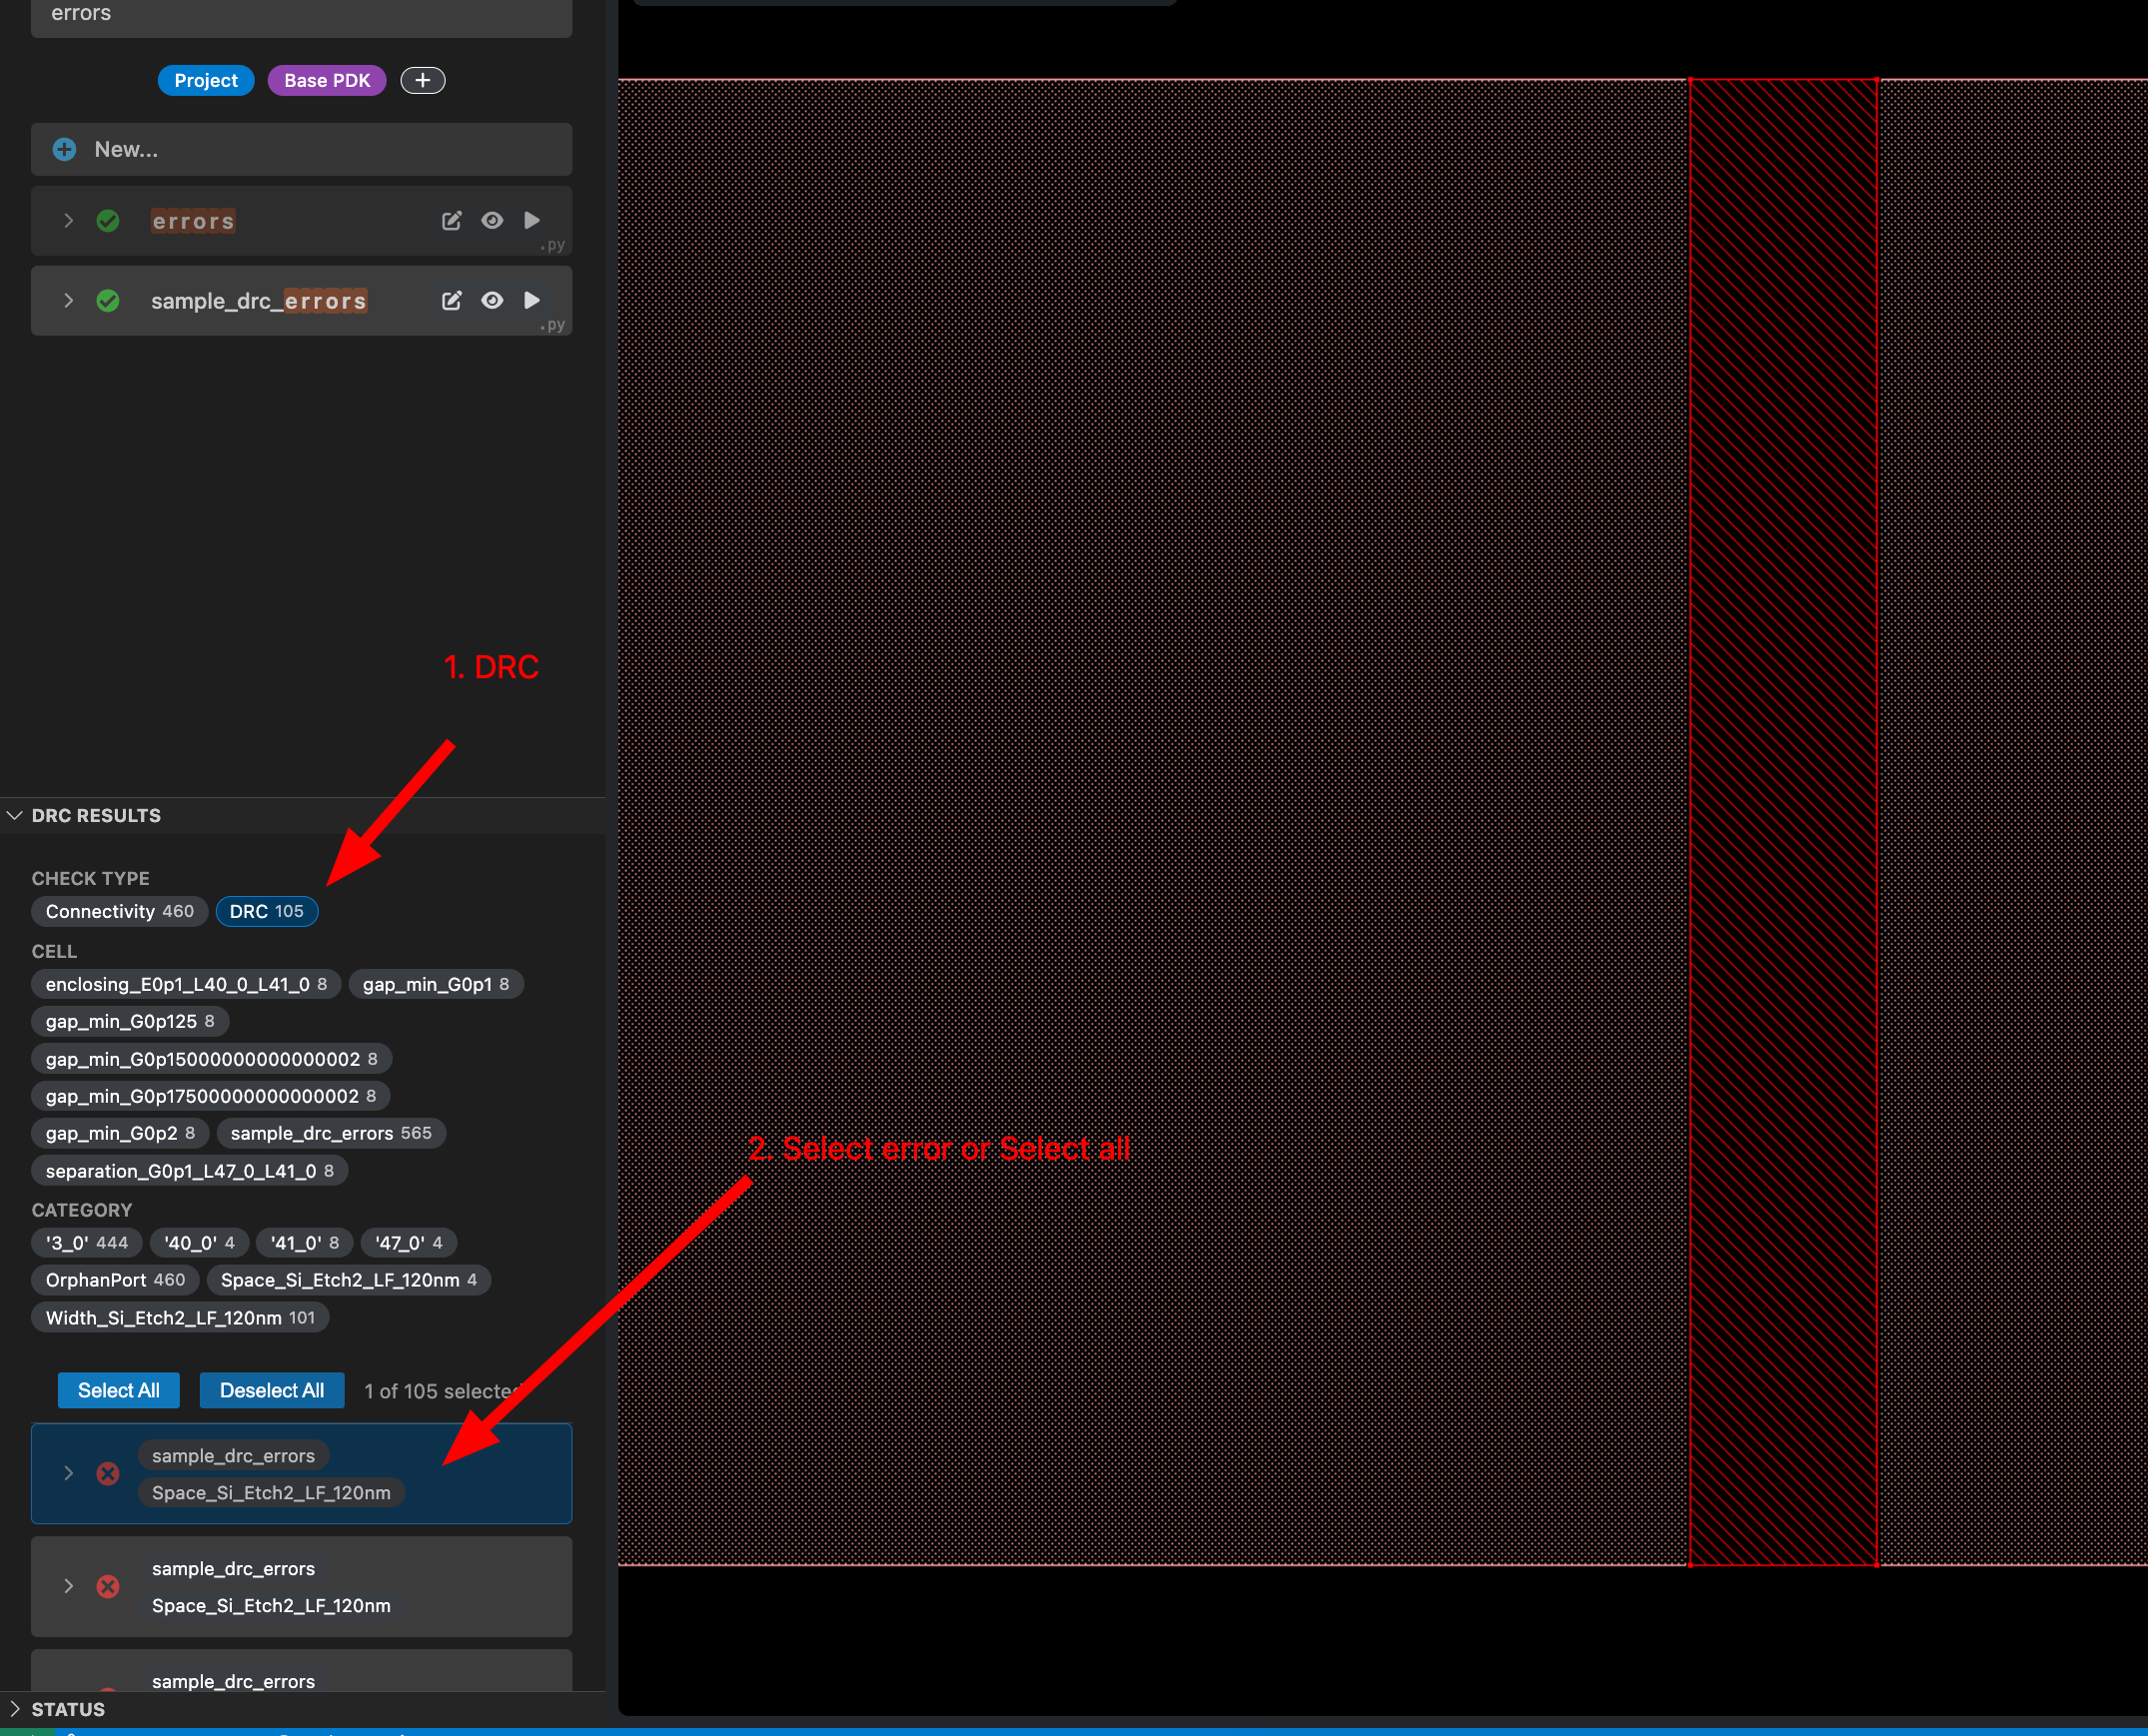
Click on any DRC error to see the error highlighted in the layout:
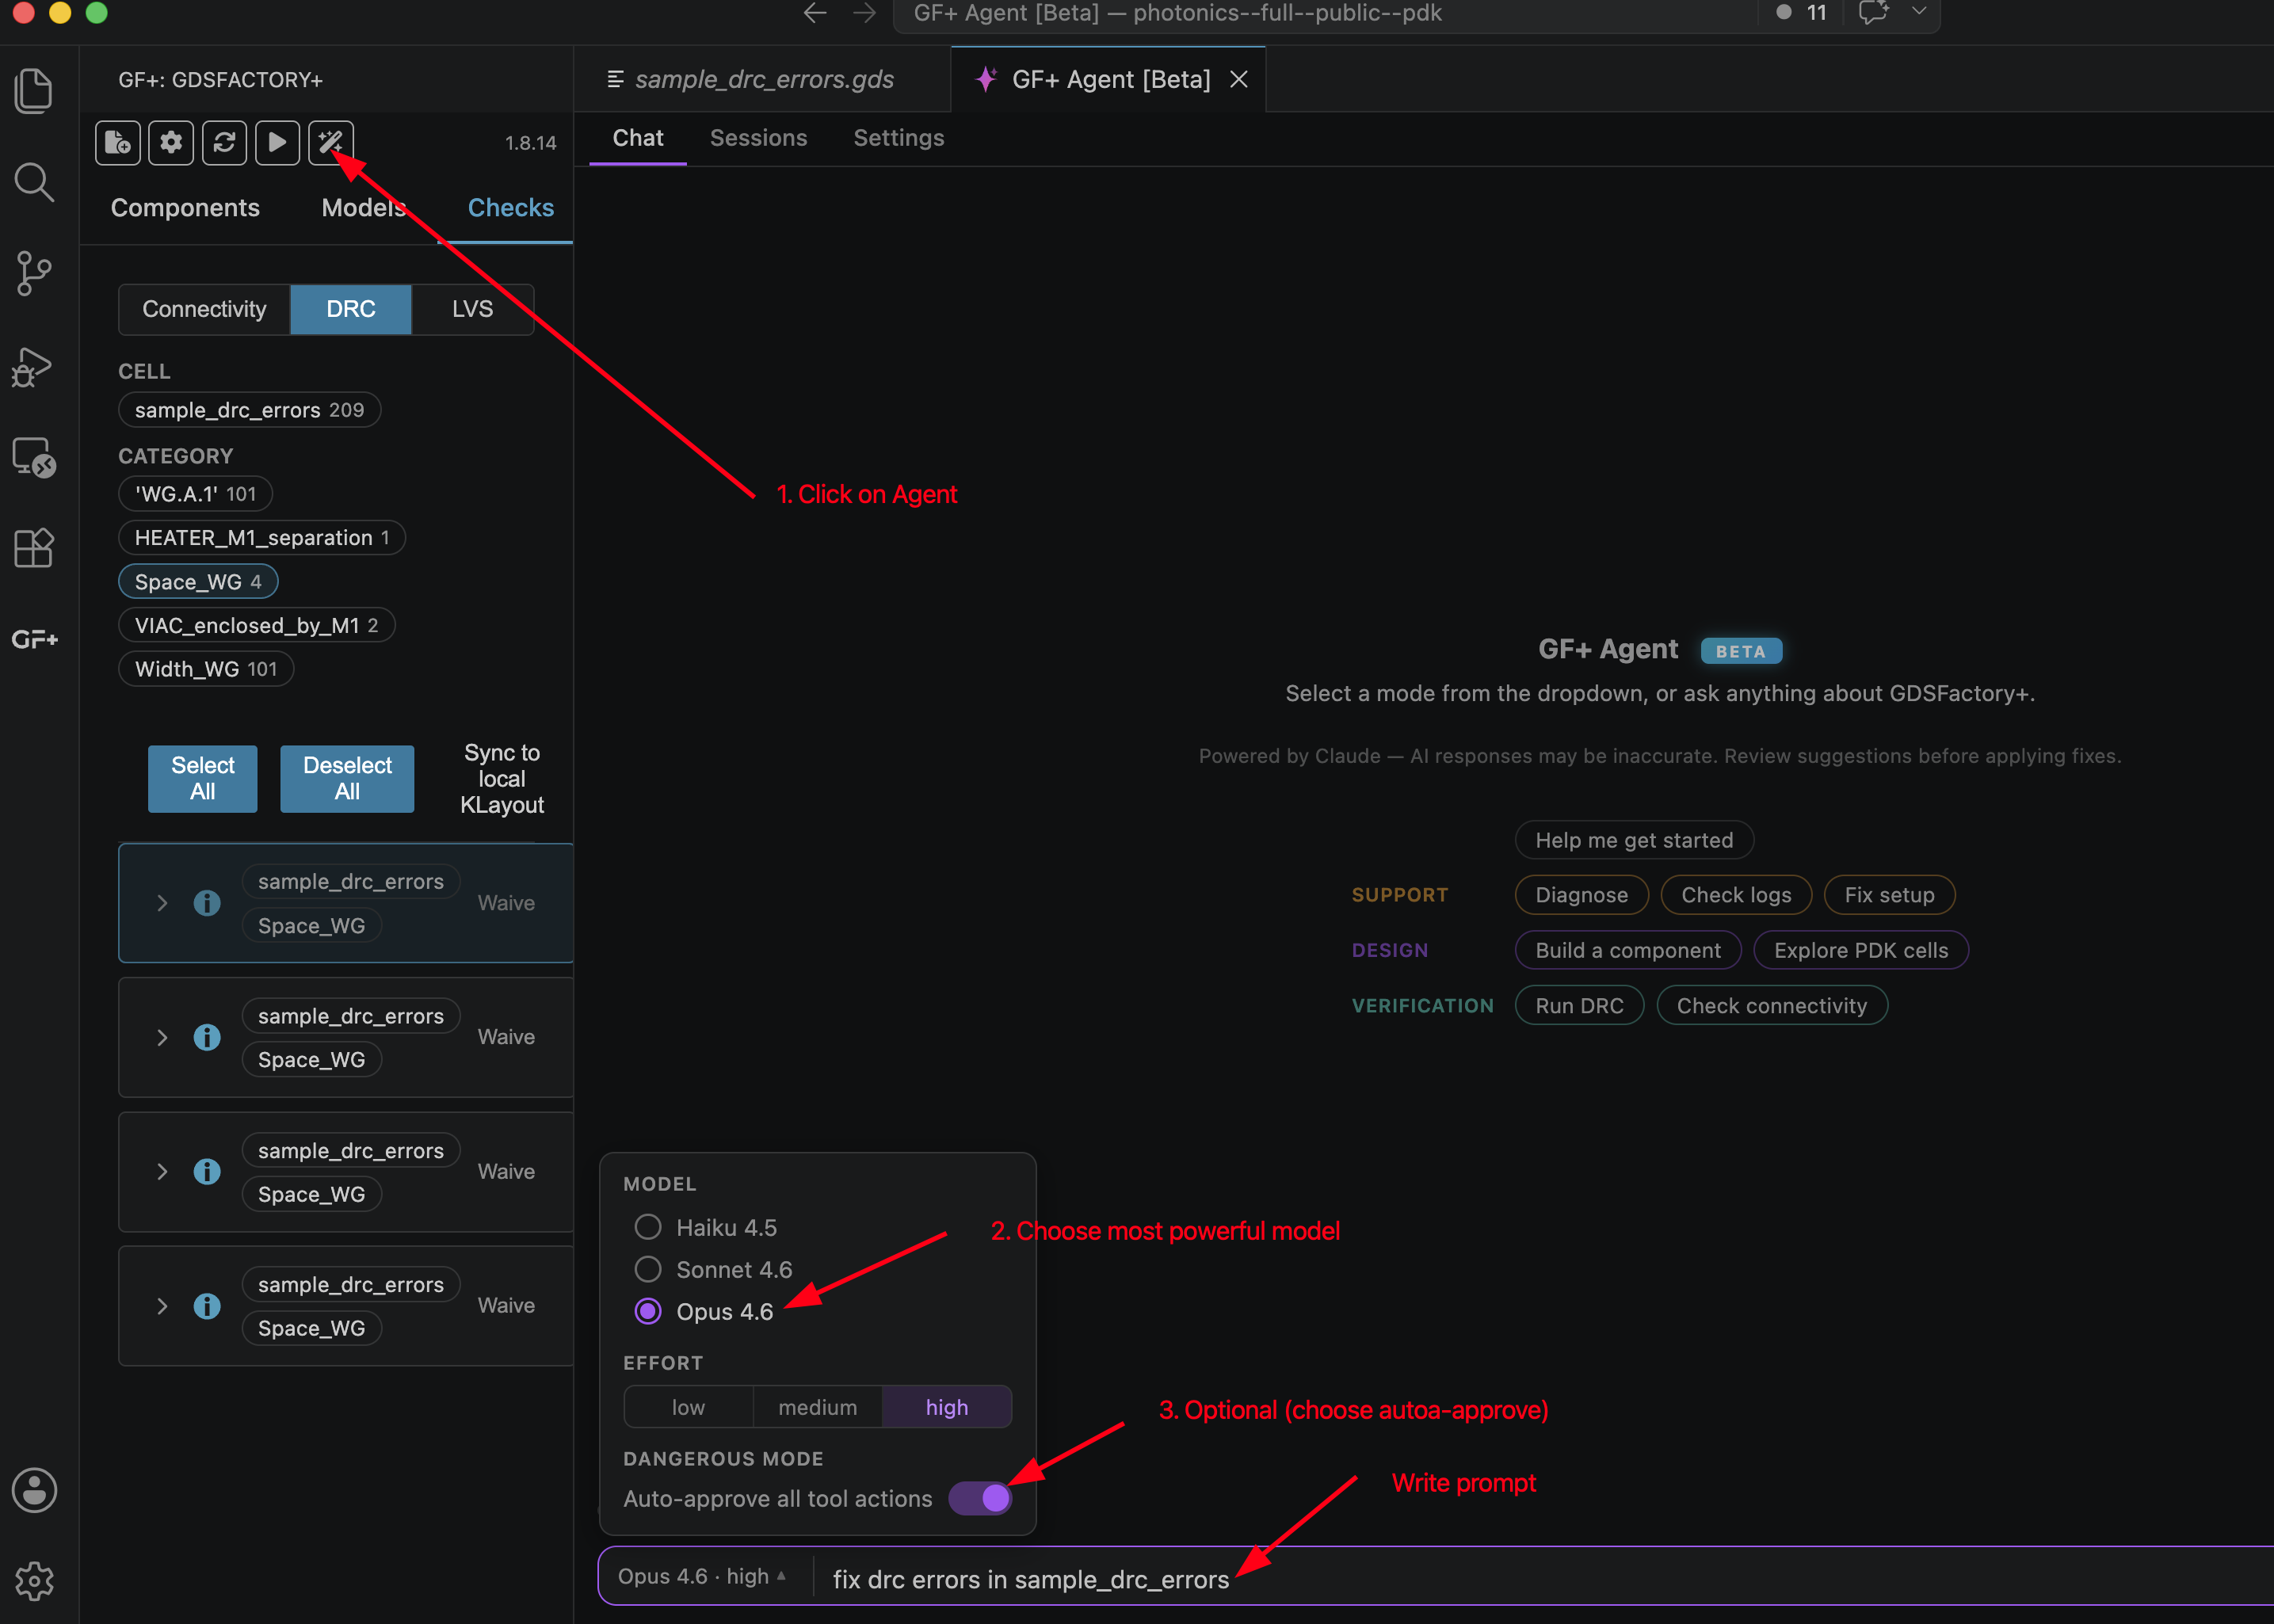
Fix the errors with the Agent (optional)
Ask the Agent to run DRC and fix the errors for you:
Fix the errors manually (optional)
Modify the Python code to remove the errors. You can access the component from the GF+ tab and edit the code. Then run the DRC again on the GDS file and repeat until you have fixed all the DRC errors.

After fixing the errors, everything is now complete. Your chip is ready for fabrication! 🎉
Try other checks (optional)
Besides DRC, you can also run Connectivity and LVS checks from the same checkmark dropdown menu in the top right toolbar.
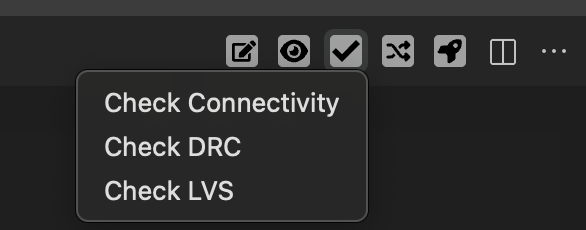
For a detailed guide on LVS checking, see Step 3b: Check for Connectivity Errors - LVS.
Next Steps
Continue to Step 3b: Check for Connectivity Errors - LVS, or skip ahead to Step 4: Build a Component with the AI Agent.