Local Installation
Install GDSFactory+ on your local machine to design photonic chips directly from VSCode.
Prefer cloud? If you have access to GDSFactory+ Cloud workspaces, see the Cloud Setup guide instead.
Compatible Platforms
- macOS (Apple Silicon)
- Linux (glibc 2.28 and up, e.g. RHEL 8+, Ubuntu 18.04+, Debian 10+)
- Windows (we recommend Windows Subsystem for Linux for better performance)
Prerequisites
Before you begin, make sure you have:
- VSCode installed, or another compatible code editor (antigravity)
- MacOS users: Xcode installed
- Windows users: We only recommend running the app inside WSL (see Windows Setup below)
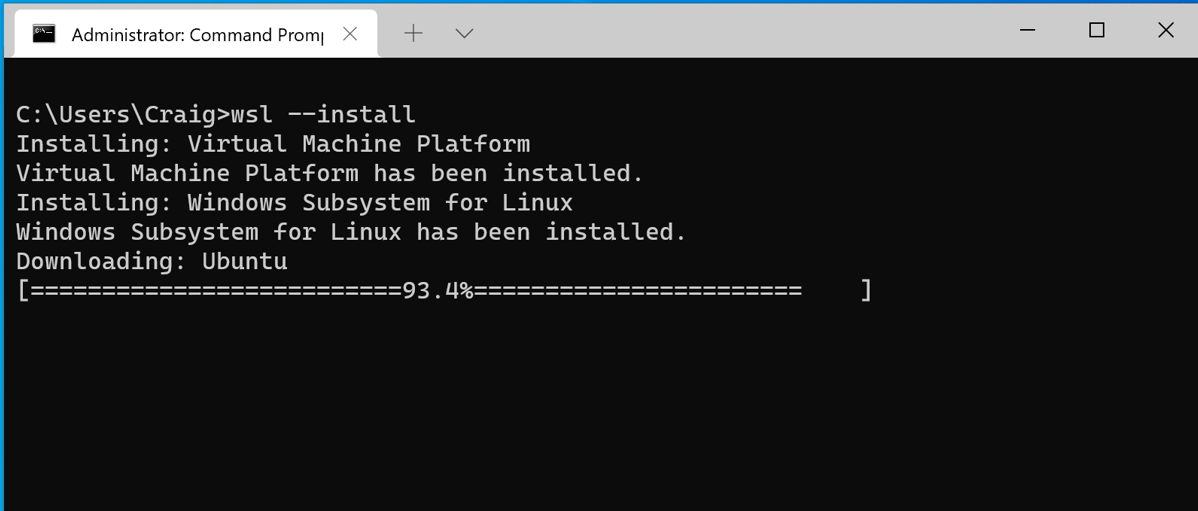
Windows Setup (WSL)
Install Windows Subsystem for Linux by running this in PowerShell (Admin):
VS Code Integration
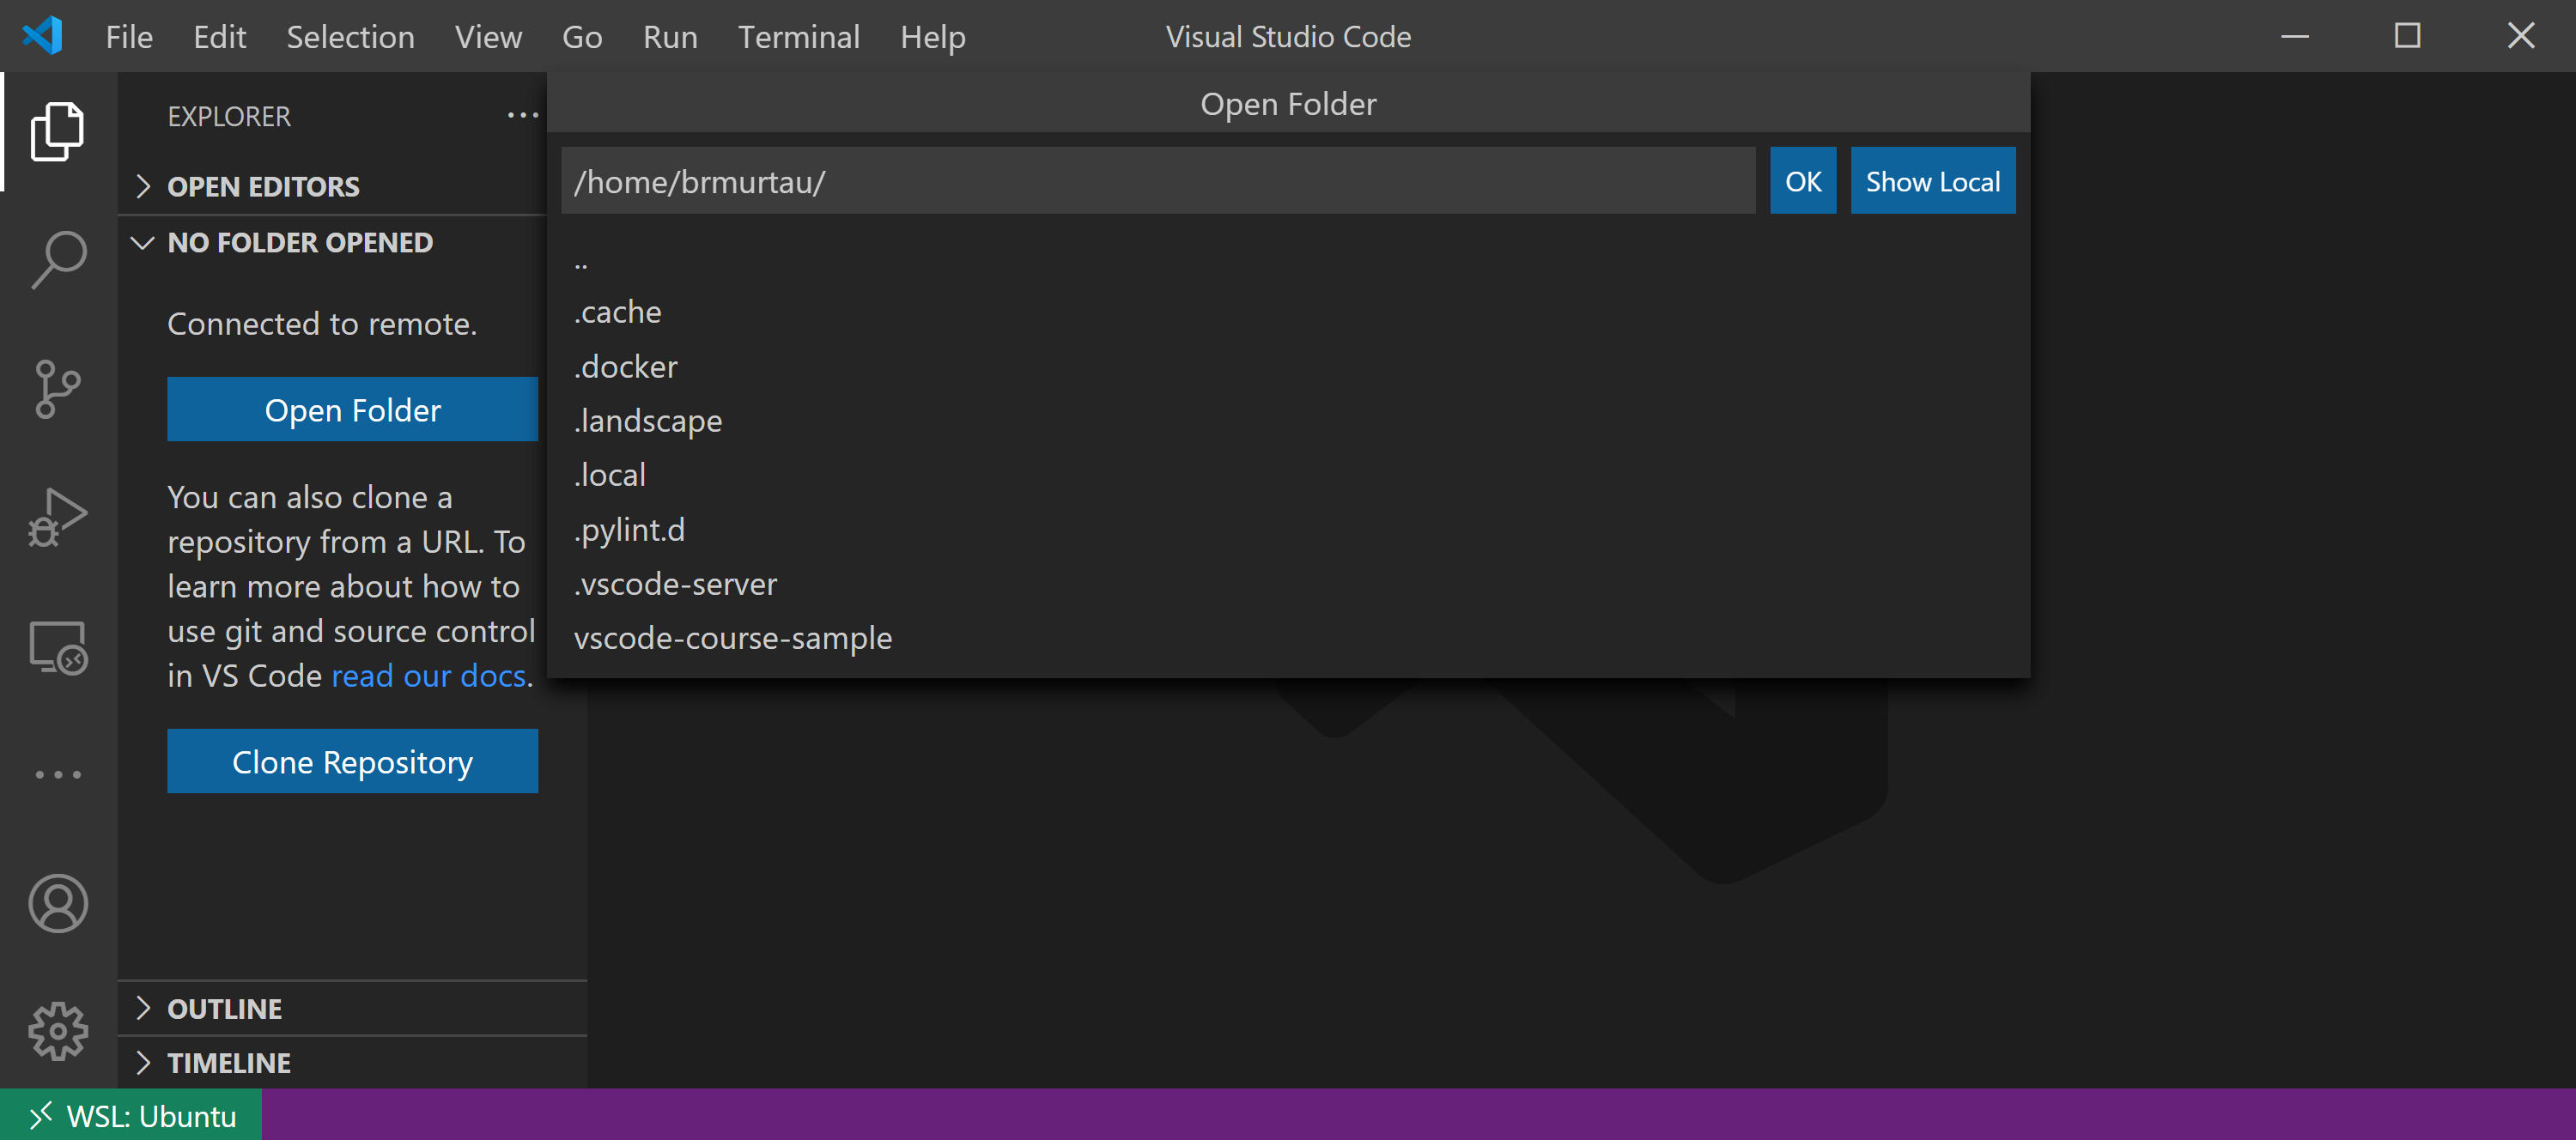
Install VS Code on Windows, then:
- Install the Remote - WSL extension
- In WSL, run
code .to open VSCode connected directly to Linux
You should see WSL indicated at the bottom-left of the VS Code window.
Where to Store Your Code
For best performance, keep your repos inside WSL, not on the Windows filesystem.
Good:
Avoid:
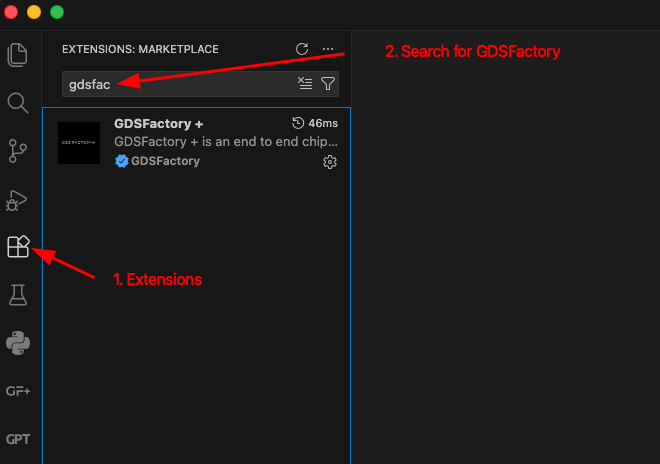
Step 1: Install the GDSFactory+ Extension
- Click the Extensions icon in the left sidebar
- Search for
GDSFactory+ - Click Install
Step 2: Open the Sample Project and Verify Your Setup
Open the sample project you received, then click the GF+ icon to open the extension panel. The Status section shows several checks:

✅ All green? You're ready to go! Skip to Next Steps.
❌ Any red checks? Follow the instructions in the panel to fix them. You may need to restart VSCode after making changes.
Common Setup Issues
UV Not Installed
GDSFactory+ uses uv to manage Python environments.
How to install: Follow the official uv installation guide.
API Key Missing
GDSFactory+ authenticates with a license server using a personal API key. Each user must create their own key.
If you have an account:
- Go to the GDSFactory+ Customer Portal
- Click API Keys in the left sidebar
- Click + New API Key
- Name your key and save it
- Click the eye icon to view the key
- Copy the key and paste it into the GF+ extension when prompted
Don't have an account?
- Ask your organization admin to send you an invitation — you need an invite before you can create an account
- If your organization doesn't have a subscription yet, sign up here
Organization Admins: You can invite users and grant admin privileges from the portal. Watch this video for a walkthrough.
PDK Not Installed
GDSFactory+ automatically manages dependencies using the pyproject.toml file in your project folder.
The sample project includes these lines:
This tells GDSFactory+ to use the Cornerstone PDK.
Version Mismatch
The VSCode extension and Python package versions must match.
If the Python package is older:
- Update the VSCode extension from the Extensions menu
If the VSCode extension is older:
- Click Create environment in the Status section of the GF+ panel
Still having issues?
- Make sure you've opened the correct folder (File → Open Folder → select
gdsfactory_sample_project) or create a new project from a template using the New Project button in the GF+ panel
Extension Menu Overview
The top menu in the GF+ panel provides tools to manage your project:
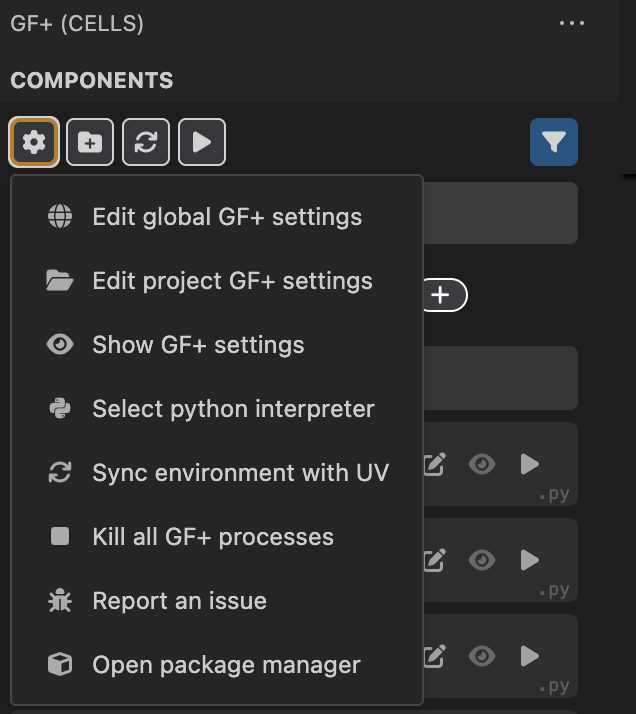
- Settings: Configure API keys and project settings
- New Project: Create a project from a template
- Reload: Refresh the current project
- Build: Build project components
Next Steps
Once all status checks are green, you're ready to start designing!
Get started:
- Follow the Quickstart Guide to design your first circuit using the Cornerstone PDK
Use a different PDK:
- Learn about working with PDKs to explore other foundry PDKs
Need help?
- Join the GDSFactory Community Slack